Event & Portal Setup
Schedule Live events, set up the event landing page, add event features and content, and set up attendee portals.
- Attendee Portals
- What is a portal?
- Add breakout sessions to a portal
- Auto-fields for event details on a portal
- Have viewers register for individual events on a portal
- Sort events and breakout sessions into categories
- Events
- Create and schedule a Live event
- Create an On-Demand event
- Create and schedule a Simulated Live event
- Add custom questions to a registration form
- Add marketing consent tracking to a registration form
- Allow people to attend an event without registering
- Auto-fields for emails
- Auto-fields for event landing pages
- Bulk registration for an event
- Embed a webcast in another website
- Limit presenter actions in the Live Studio
- Set up an event in another language
- Set up Guest Administrator accounts
- Set up the registration form for an event
- Accessing events and attendee portals in China
- Send follow-up emails for an event
- Send registration confirmation emails for an event
- Auto-fields for emails
- Send reminder emails for an event
- Event Content
- About Q&A
- Add a third-party video to a custom tab
- Add third-party tools to an event
- How do I create a certificate?
- Overlay video specs and requirements
- PowerPoint Best Practices
- Primary media clip specs and requirements
- Remove embedded fonts from slides
- Supported 3rd party tools
- Upload audio clips for use in a recorded event
- Upload videos for use in a recorded event
- Upload videos to play in a Live event
- Upload Slides to an Event
- Add headshots to an audio event
- Add content download or external links
Attendee Portals
What is a portal?
A portal is a website that you set up to host multiple events, replays, and other content from a single link. With a portal, your visitors register one time and can attend any of the events on the portal. Reporting is similar to event reports, except the results include all events on the portal.
To create a portal, sign in to the Webcast Admin portal. At the top right of the My Events tab, click Create New Portal. Create the events first and then in portal setup, select the events you would like to include.
This article is an introduction to portals and provides some examples.
Portal basics
Every portal includes a registration page and a list of events. You can include all types of events: Live, Simulated Live, and On-Demand (or replays). You can also host breakout sessions in any meeting app of your choice; just add the meeting URL.
You can choose from different layouts to set up the registration page. Similar to event setup, you can use branding to customize colors, add logos, add background images, and more. For the portal itself, there are several layouts for listing your events, as well as grouping options to organize the events.
Organize your events
On a portal, the list of events is called an agenda or schedule. Each event linked to the portal agenda is a segment.
- On the Portal Layout tab, choose how your portal will look once a visitor signs in.
- On the Manage Segments tab, select the events and breakout sessions to include on the portal agenda and sort them.
The portal sorts events by their scheduled date and time. Depending on the layout you select, you can use automatic grouping to further group events into tabs with their scheduled date or you can create your own custom categories (called tracks).
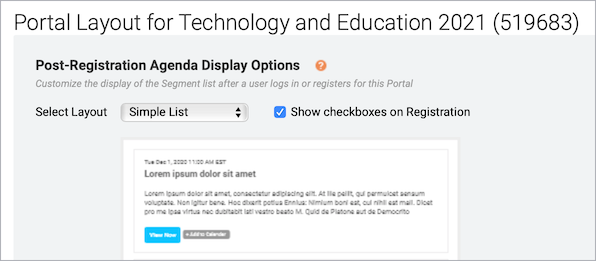
- The Simple List layout is just as it sounds - a list of events, sorted by date and time. For automatic grouping, select a different layout.
- The other layouts add visual elements like expandable accordions and tabs to group events. On the Manage Segments tab, create categories and assign events to them or group events automatically by date. The category names or dates display on the accordions, tabs, etc.
- Show checkboxes on Registration is available for Simple List and Custom layouts only. Select this option to allow viewers to select which events they would like to access.
Example 1 - Simple list of events
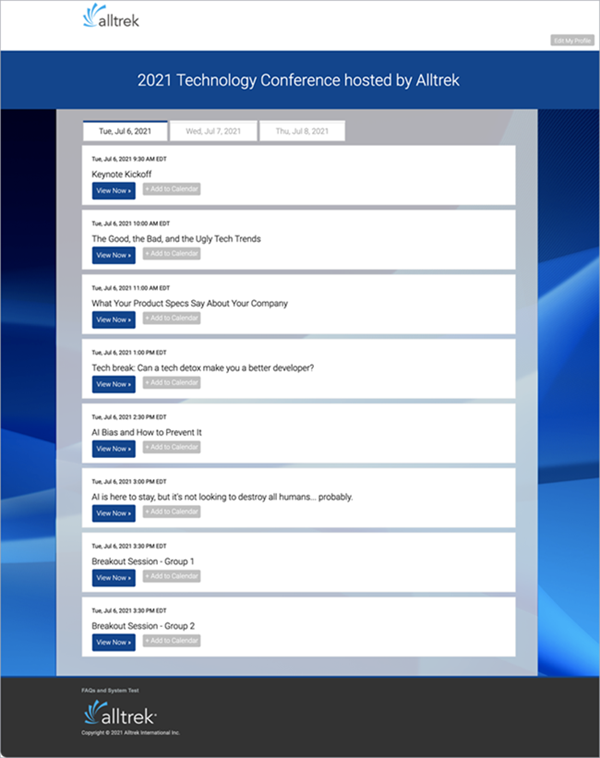
This example sets up a portal with six events and two breakout sessions for the same date, sorted by time.
- Layout: Simple List
- Automatic Grouping: None (not available with Simple Layout)
- Categories: None (not available with Simple Layout)
On the Manage Segments tab, click Add Segments and select the events to include.
The resulting portal looks like this.

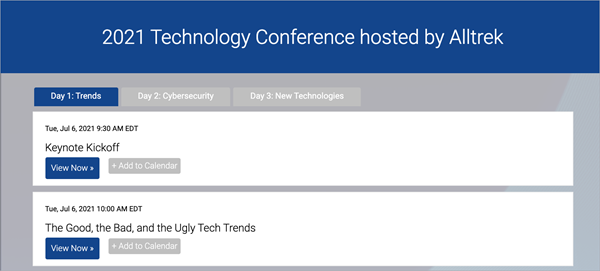
Example 2 - Events organized into tabs by date
This example sets up a portal with six events and two breakout sessions per date. They are grouped into tabs by their scheduled date. The portal displays the dates on the tabs.
- Layout: Tabs
- Automatic Grouping: Broadcast date tabs
- Categories: None
On the Manage Segments tab, click Manage Categories to access the automatic sorting options. You don't have to create any categories.

The resulting portal looks like this.
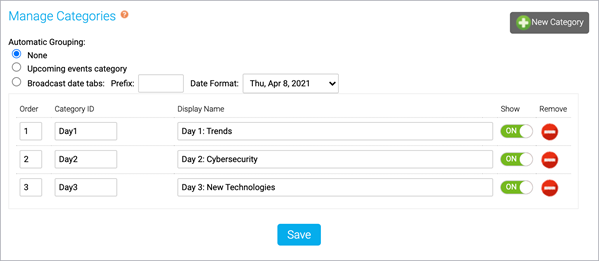
Example 3 - Events organized by categories (tracks)
This example sets up a portal with six events and two breakout sessions per date. They are grouped into three custom categories. The portal displays the category names on the tabs.
- Layout: Tabs
- Automatic Grouping: None
- Categories: Yes
On the Manage Segments tab, click Manage Categories to set up the categories. Then assign the events to the categories you created.

The resulting portal looks like this:

Add breakout sessions to a portal
Engage your viewers and allow viewers to attend breakout sessions from the portal agenda page. After you select a portal layout, you can start adding breakout sessions (segments) to your portal from the Manage Segments tab and link them to any meeting app you choose, including GlobalMeet Collaboration, Zoom, Microsoft Teams, and more. Breakout sessions display in the list of events on your portal.
Note: Viewers can access your meeting room link before the scheduled breakout session time. Ensure that your meeting has security features, such as a waiting room, turned on to prevent guests from joining early. Or, you can hide the View Now button after you've created the breakout session.
To add a breakout session:
- Sign in to the Webcast Admin portal and edit the portal.
- On the left panel, click the Manage Segments tab.
- At the top right of the tab, click Add Breakout.
- Enter a name for the session and your meeting link, schedule the breakout session, and optionally add a description.

- Click Save Changes to save the session. Then click Save and Continue to save changes to the portal.

Once you've added the sessions, you can sort them into categories.
Auto-fields for event details on a portal
Jump to: Auto-field Reference | Customization Example
The portal agenda displays specific details about each event, or linked segment. It uses auto-fields - that is, placeholders or variables - to pull in specific details about each event. By default, the agenda includes the date, title, and description for the event, with View Now and Add to Calendar buttons.
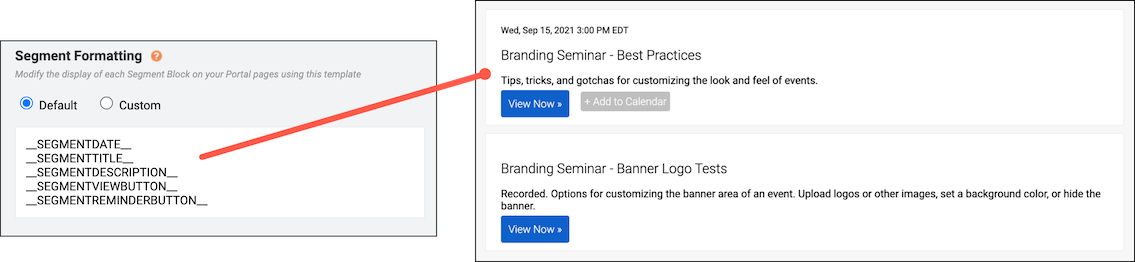
To customize the details displayed, go to the Portal Layout tab and under Segment Formatting select Custom. This opens the Content Editor, where you can add and apply styling to auto-fields as well as include text, images, and other elements. Available auto-fields are displayed below the edit area.
Important: Segment formatting sets the content displayed for every event. Only include text or images that you would like repeated with each segment block.
Auto-field reference
The format of an auto-field is __AUTOFIELD__ (the auto-field with two underscores before and after).
The following table explains the available auto-fields and the text they display.
| Auto field | Description |
|---|---|
| __SEGMENTDATE__ | Scheduled day, date, and time |
| __SEGMENTTITLE__ | Event title |
| __SEGMENTTIME__ | Scheduled time |
| __SEGMENTDESCRIPTION__ | The description you entered on the Manage Segments tab |
| __SEGMENTVIEWBUTTON__ | View Now button |
| __SEGMENTREMINDERBUTTON__ | Add to Calendar button |
| __SEGMENTLIVENOW__ | Add a live indicator to events on the portal when their scheduled date and time arrives |
Per-event registration
If you are using per-event registration, you can add event registration to the main registration page. This lets visitors register for the portal and specific events at the same time. For more information, see Have viewers register for individual events on a portal.
On the Registration tab, scroll to Customize Event Landing Page and next to Landing Text, select Custom.
The following table explains the available auto-fields.
| Auto field | Description |
|---|---|
| __ALLSEGMENTS__ | All events linked on the portal |
| __SEGMENTBLOCK1__ | The first event linked on the portal, based on the order you set on the Manage Segments tab |
| __SEGMENTBLOCK2__ | The second event linked on the portal |
| __SEGMENTBLOCK3__ | The third event linked on the portal |
| __SEGMENTBLOCK4__ | The fourth event linked on the portal |
| __SEGMENTBLOCK#__ | The Nth event linked on the portal |
Customization example
This example adds text before the __SEGMENTTIME__ auto-field to update the first line of each segment block. By default, text on the first line is smaller than other details. In the Content Editor, we selected the updated line and clicked the Text Size (T) button to increase the font size.

Have viewers register for individual events on a portal
Available with Simple List and Custom portal layouts (on the Portal Layout tab).
With a portal, your viewers register one time and can attend any of the events after signing in to the portal. If you want, you can add checkboxes to the portal agenda and let viewers register for the events they plan to attend.
When a viewer enters a specific event from the portal, their registration data is included in the event's reports.
Enable registration checkboxes
On the Portal Layout tab, select Simple List or Custom layout and select Show Checkboxes on Registration.
You can use the provided agenda format or scroll to Segment Formatting and select Custom.
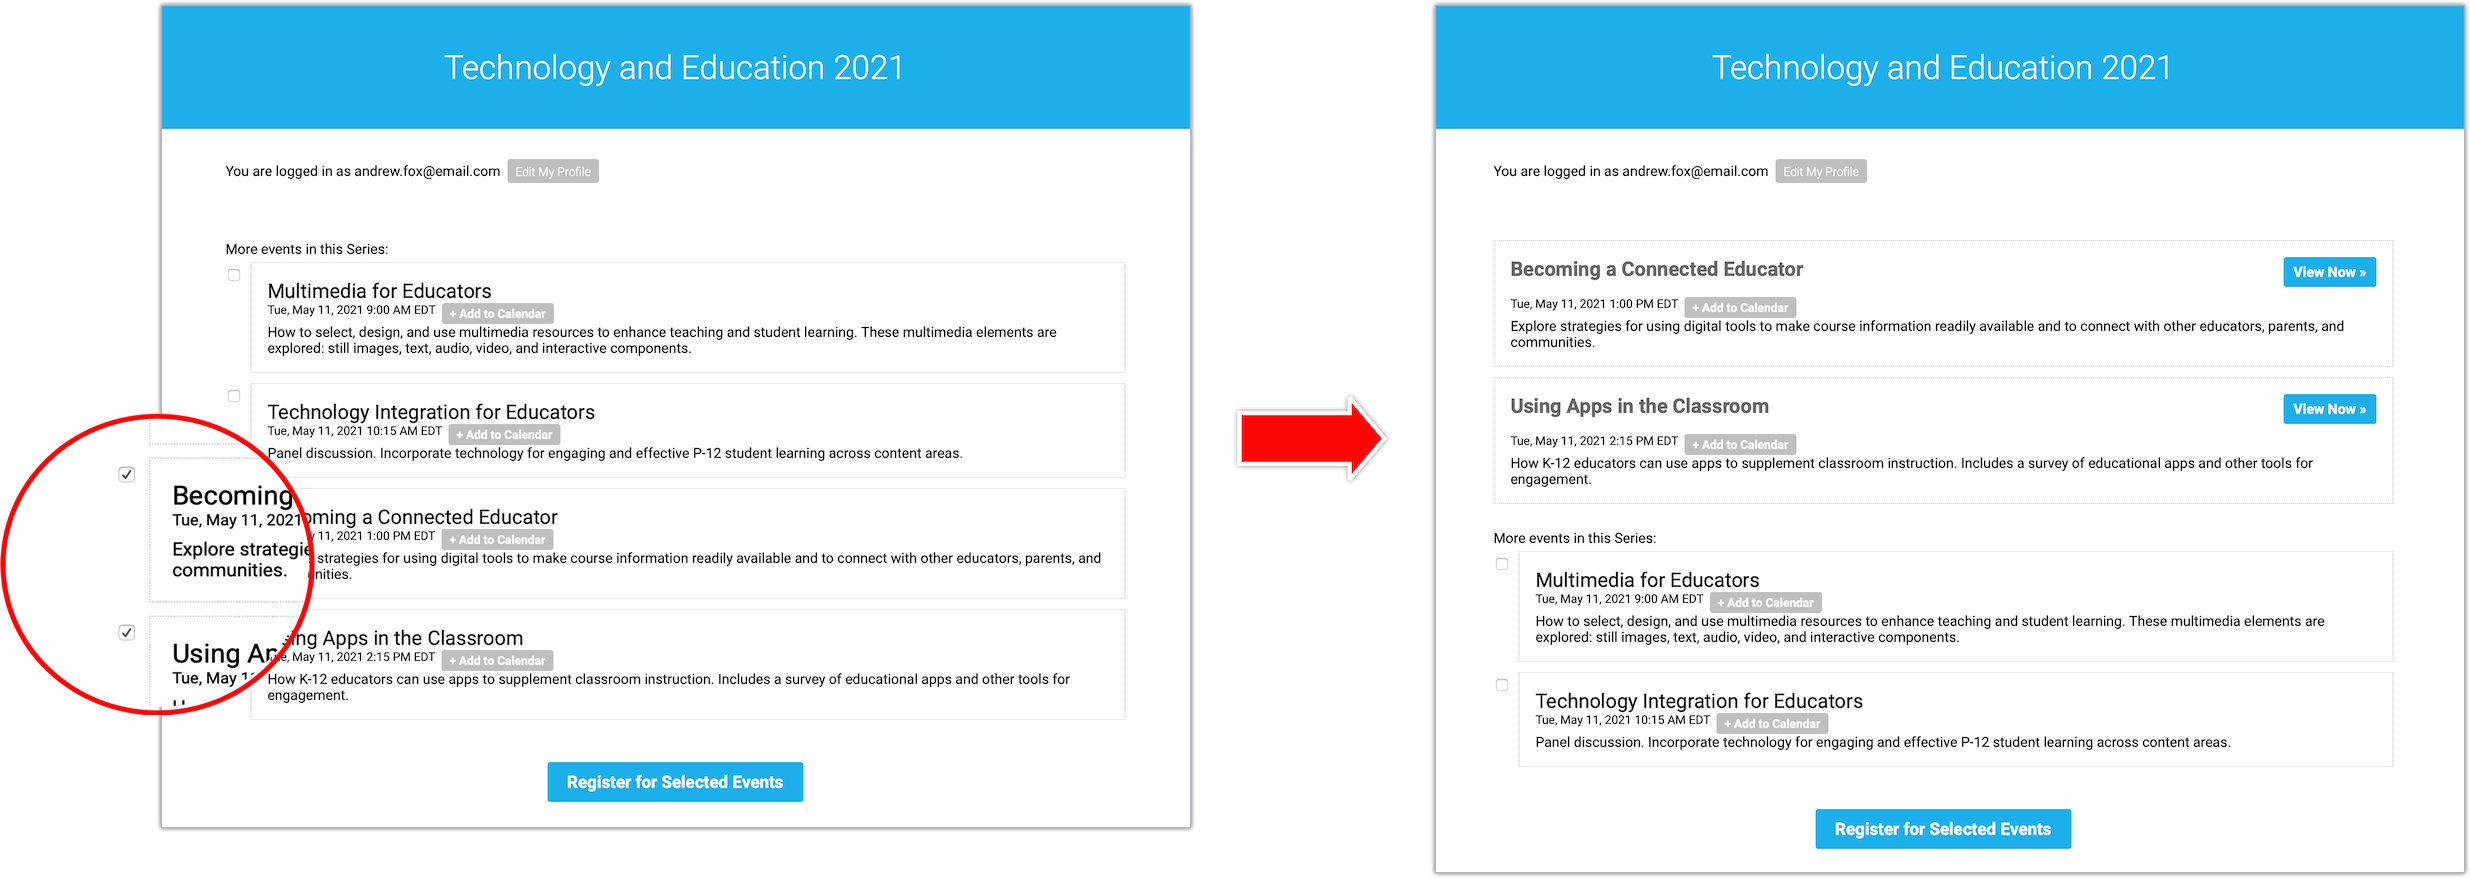
What your viewers see
On the portal agenda, viewers initially see a list of events with check boxes. They select each event they plan to attend and then click Register for Selected Events. Registered events are listed events at the top, followed by additional event they could register for.
Example code
Here is the coding from the previous example.
<div style="border:1px dotted #ccc; padding: 16px; margin-bottom:10px;"> <div style="width:auto; float:left;"><span style="font-size:20px;">__SEGMENTTITLE__</span></div>
<div style="float:right; text-align:right;">__SEGMENTVIEWBUTTON__</div>
<div style="clear:both; float:left;"><span style="font-size:12px;">__SEGMENTDATE__</span></div>
<div style="float:left;"><span class="reminderButton" style="margin-left:6px;">__SEGMENTREMINDERBUTTON__</span></div> <div style="clear:both;"><span style="font-size:14px;">__SEGMENTDESCRIPTION__</span></div>
</div>
To use this formatting:
- On the Portal Layout tab, scroll to Segment Formatting and select Custom.
- At the right side of the editor, click </> to switch to code view.
- Delete all the placeholder code.
- Paste the example code.
- Click Save and Continue.
Sort events and breakout sessions into categories
After you add events and breakout sessions to the portal, the portal automatically sorts them by their scheduled date and time. Depending on the portal layout you select, you can further group your events with automatic grouping and sort events into tabs by broadcast date or into custom categories (or tracks) you create.
Select a layout
Before you categorize events and breakout sessions, you must select the correct layout.
Sign in to the Webcast Admin portal and edit the portal.
To select a layout:
- On the left panel, click the Portal Layout tab.
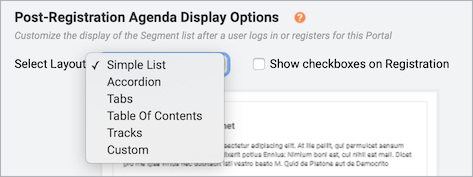
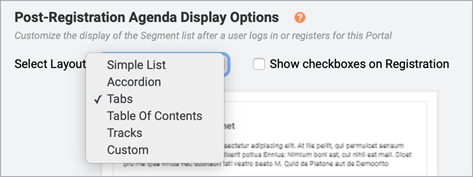
- Under Post-Registration Agenda Display Options, select the:
- Tabs layout to sort events into broadcast date tabs.
- Accordion, Tabs, Table of Contents, or Tracks layout to sort events into custom categories.
Note: Simple List and Custom layouts do not support automatic grouping.
- Click Save and Continue.

Sort with broadcast date tabs
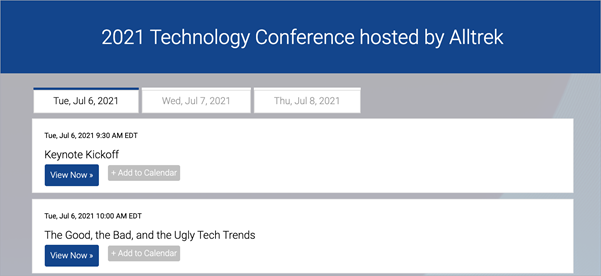
If your conference takes place over several days, you can automatically group them into tabs with their scheduled date. If the date of an event or breakout session changes, it is automatically sorted into the correct date tab on the portal.
This is an example of a portal with a Tab layout and events sorted into broadcast date tabs.
To sort events and breakout sessions into tabs by date:
- On the left panel, click the Manage Segments tab.
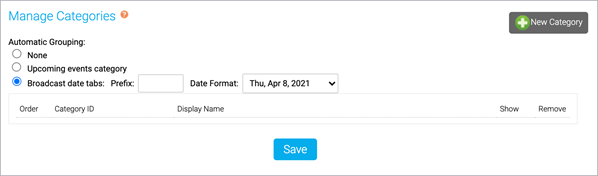
- On the Manage Segments tab, click Manage Categories.
- On the Manage Categories window, under Automatic Grouping, select Broadcast date tabs and then click Save.

- Then on the Manage Segments tab, click Save and Continue.
Sort with custom categories
Create your own custom categories to separate different conference days, topics, and more.
This is an example of a portal with a Tab layout and events sorted into custom categories.
To sort events and breakout sessions into custom categories:
- On the left panel, click the Manage Segments tab.
- On the Manage Segments tab, click Manage Categories.
- On the Manage Categories window, under Automatic Grouping, select None.
- Click New Category and enter a Category ID and a Display Name for each of your categories.
The Category ID is used to assign events and breakout sessions to the category in the Webcast Admin portal and does not display on the portal agenda page. The Display Name is the title of the category that viewers see on the portal.
Note: Category IDs can't contain any spaces or special characters.

- Once you've created your categories, click Save.
On the Manage Segments tab, a new Category column displays.
- In the Category column, select a Category ID for each event and breakout session to assign them to categories.
Note: You must assign categories to all of your events and breakout sessions for them to display on the portal.
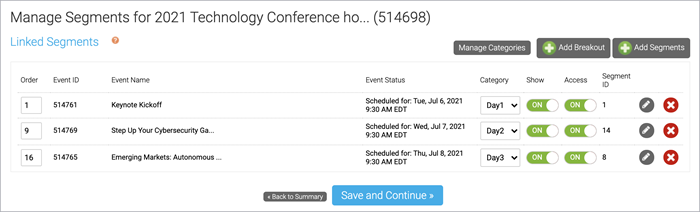
- After you've assigned your categories, click Save and Continue.

Events
Create and schedule a Live event
Live events are broadcast live at the date and time you schedule. When setting up a Live event, choose how presenters will speak to the audience (on- or off-camera), the length of the event, and the maximum number of attendees allowed.
Note: The event can be from 30 minutes to 8 hours long and can be scheduled at any 5-minute interval on the hour (9:00, 9:05, 9:10, etc.).
To schedule a Live event:
- In the Webcast Admin portal, at the top of the page, click + Create New Event.

- On the Event Settings tab, enter the event name.

- Next to Event Type, select Live with Archive.

- Select the event date and time, duration, and time zone.
- For the Live Acquisition Source, select how presenters will broadcast on the day of the event. If you're broadcasting audio only, select Telephone. If presenters will broadcast live video, select Webcam, Video Bridge, or another source, and then select the location you'll be broadcasting from.
- For Max. Audience Size, select the number of people you expect to attend the event. Access will be limited to this number of simultaneous live viewers.
- Once the event details are complete, at the bottom of the Event Settings tab, click Create Event to proceed with the setup process.
Create an On-Demand event
On-Demand events are recordings that can be watched at any time. When setting up an On-Demand event, select whether the primary media clips (typically presenter narration) you plan to include are audio or video files. This Media setting affects what you can upload to the event and present in the video player (headshots with audio or videos) and the video player size (on the Player & Branding tab). You can include overlay videos regardless of the Media type you select.
After creating the event, go to the Event Content tab to upload your primary media clips, slide decks, videos, and other content you'll share in the event. Then, open the On-Demand Studio and assemble your event. To learn more about uploading clips and assembling the event, see:
- Upload audio clips for use in a recorded event
- Upload videos for use in a recorded event
- Assemble or edit an event recording
Note: The event can be from 30 minutes to 8 hours long.
Jump to: Create an On-Demand event | Allow attendees to view the event
Create an On-Demand event
To create an On-Demand event:
- In the Webcast Admin portal, at the top of the page, click + Create New Event.
- On the Event Settings tab, enter the event name.
- Next to Event Type, select On-Demand.

- Select the event duration.
- Select the type of media you'll be uploading as the primary event content. This affects the size of the video player (on the Player & Branding tab). If you will upload:
- Audio files to play while displaying presenter headshots in the video player, select Audio.
- Video files to use as presenter video in the video player, select Video.
- For the Max. Audience Size, select the number of people you expect to watch the recording at one time. Access to your event will be limited to this specified number of simultaneous viewers.
- Once the event details are complete, at the bottom of the Event Settings tab, click Create Event to proceed with the setup process.
Allow attendees to view the event
Once the event is ready for viewing, make sure to allow attendees to access the event. By default, the event window is closed to attendees to prevent them from viewing the event before it has been assembled.
To allow attendees to access the event:
- Go to the Event Summary tab.
- In the Event Details section, under Event Access, click Manage Access.

- On the Manage Event Access window, set the Player to Open.

- Optional. Set the player to close at a scheduled date and time and update the message attendees see when they join the event when the player is closed.
- Click Save Changes.
Create and schedule a Simulated Live event
Simulated Live events are recordings that are broadcast at the date and time you schedule. You can create a Simulated Live event with pre-recorded media that you upload or schedule a recording session to capture the event content. Either way, you'll use the Simulated Live Studio to finalize and publish the event.
Once the recording is ready, schedule the broadcast. You can re-broadcast a Simulated Live event. After the first Simulated Live broadcast is over, go back to the Event Settings tab and schedule another broadcast.
Note: The event can be from 30 minutes to 8 hours long.
Jump to: Create a Simulated Live event with pre-recorded media | Create and record a Simulated Live event | Schedule a Simulated Live broadcast
Create a Simulated Live event with pre-recorded media
When setting up a Simulated Live event with pre-recorded media, select whether the primary media clips (typically presenter narration) you plan to include are audio or video files. This Media setting affects what you can upload to the event and present in the video player (headshots with audio or videos) and the video player size (on the Player & Branding tab). You can include overlay videos regardless of the Media type you select.
After creating the event, go to the Event Content tab to upload your primary media clips, slide decks, videos, and other content you'll share in the event. Then, open the Simulated Live Studio and assemble your event. To learn more about uploading clips and assembling the event, see:
- Upload audio clips for use in a recorded event
- Upload videos for use in a recorded event
- Assemble or edit an event recording
To create a Simulated Live event and upload pre-recorded media:
- In the Webcast Admin portal, at the top of the page, click + Create New Event.
- On the Event Settings tab, enter the event name.

- Next to Event Type, select Simulated Live.

- Next to SimLive Source, select Upload Media Files.
- Select the event duration.
- Select the type of media you'll be uploading as the primary event content. This affects the size of the video player (in the Player & Branding tab). If you will upload:
- Audio files to play while displaying presenter headshots in the video player, select Audio.
- Video files to use as presenter video in the video player, select Video.
- For the Max. Audience Size, select the number of people you expect to attend the event when it is live. Access to your event will be limited to this specified number of simultaneous viewers.
Note: You can update the number of attendees when scheduling the Simulated Live broadcast.
- Once the event details are complete, at the bottom of the Event Settings tab, click Create Event to proceed with the setup process.
Create and record a Simulated Live event
When setting up a Simulated Live event with a recording session, schedule the session, upload content, and on the day of the session, use the Live Studio to record the event. When the recording is complete, you'll be able to edit it in the Simulated Live Studio. To learn more about editing the recording, see Assemble or edit an event recording.
To create a Simulated Live event and schedule a recording session:
- In the Webcast Admin portal, at the top of the page, click + Create New Event.
- On the Event Settings tab, enter the event name.
- Next to Event Type, select Simulated Live.


- Next to SimLive Source, select Record Media.
- Select the date and time, duration, and time zone for the recording session.
- For the Capture Acquisition Source, select how presenters will broadcast on the day of the recording session. If you're broadcasting audio only, select Telephone. If you plan to broadcast live video, select another broadcast type and select the location you'll be broadcasting from.
- For the Max. Audience Size, select the number of people you expect to attend the event when it is live. Access to your event will be limited to this specified number of simultaneous viewers.
Note: You can update the number of attendees when scheduling the Simulated Live broadcast.
- At the bottom of the Event Settings tab, click Create Event to proceed with the setup process.
Schedule a Simulated Live broadcast
Once your recording has been finalized and published in the Simulated Live Studio, schedule when you want the event to be broadcast. Once you schedule a broadcast, attendees can access the event, but the recording won't be played until the scheduled date and time.
To schedule a Simulated Live broadcast:
- Go to the Event Settings tab for the event and under Event Type, click Schedule a New Broadcast.

- Select the event date and time and time zone.

- Optional. If the number of people attending the broadcast is different from the number you selected when creating the event, update the Max. Audience Size.
- Click Save and Continue.
After you broadcast a Simulated Live event, it is added to the list of previous broadcasts above the Schedule a New Broadcast button. The event in this example has been broadcast two times.

Add custom questions to a registration form
In addition to standard registration questions, you can add custom questions to the registration form and choose how registrants will answer each question. Registrants can either type their answers in an open text field or select from pre-defined answers that you set up. For more information, see Answer Types later in this article.
To add a custom registration question:
- On the left panel, click the Registration tab.
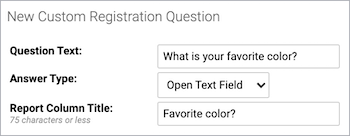
- Scroll to Custom Registration Questions and click Add New Custom Question.

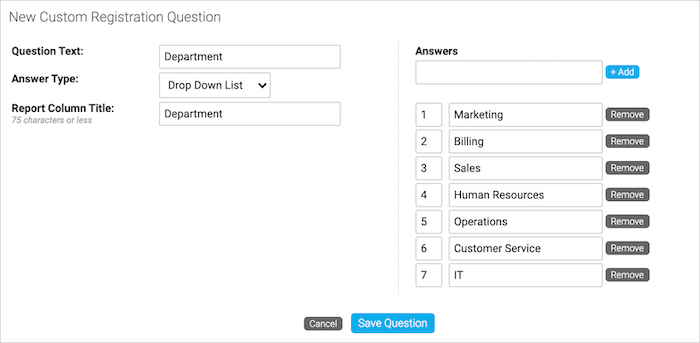
- In the New Custom Registration Question section, enter the question (or field label), the type of question (will the registrant type their answer or select from defined answers?), and the column name to identify the question in reports.

- If you selected Drop Down List, Checkboxes, or Radio buttons as the Answer Type, enter the answers to the question and click + Add.
- Click Save Question. The new question is listed under Custom Registration Questions.
- Optional. Select Require to require registrants to answer the question to register.

- Repeat steps 3 to 7 to add more questions.
- Click Save and Continue to save changes to the registration form.


You can edit or delete the custom questions at any time.
Answer Types
For each question, decide whether the registrant will type their answer or select from pre-defined answers. The following table explains options and recommended use.
| Answer Type | Used for |
|---|---|
| Open Text Field | Open-ended questions that require a short answer |
| Open Text Area | Open-ended questions that require a longer answer |
| Drop Down List and Radio Buttons |
Multiple-choice questions where only one answer can be selected. A drop down list hides the answers (registrants click to display options); radio buttons show all the answers. |
| Checkboxes | Multiple-choice questions where multiple answers can be selected |
| Single Checkbox | Questions where only one answer can be selected or for disclaimers or statements that need to be acknowledged |
Add marketing consent tracking to a registration form
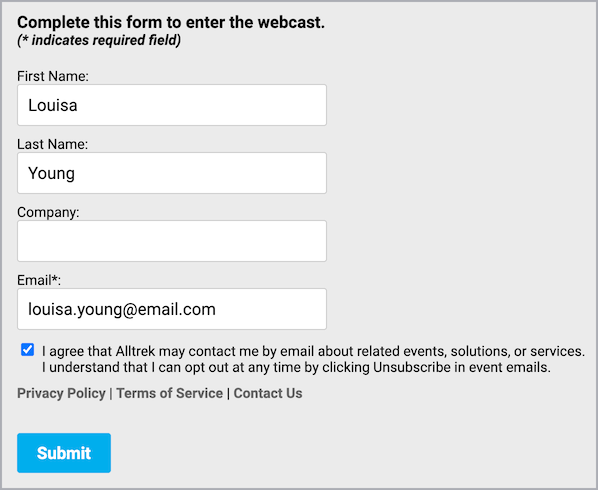
You can collect marketing consent from event and portal registrants and provide links to privacy policies, terms of service, and more on the registration form. Event and portal reports let you easily identify those who provided consent and ensure you communicate only with those who opted in.
If a registrant does not select the marketing consent check box on the registration page they will not receive webcast registration confirmation, reminder or follow-up emails for the webcast. Registrants can also unsubscribe from emails at any time by clicking Unsubscribe at the bottom of the emails.
To allow attendees to opt in to emails:
- Sign in to the Webcast Admin portal and edit the Live event or portal.
- On the left panel, click the Registration tab.
- Under Standard Registration Questions, select [INSERT COMPANY NAME HERE] may contact me....
![Standard Registration Questions section with [INSERT COMPANY NAME HERE] option selected](https://gotohelp.webcasts.com//uploads/images/gallery/2022-05/scaled-1680-/ewzokyF1OsI3745q-registration-emailconsent-croppedsimplify.png)
- In the Question field, delete [INSERT COMPANY NAME HERE], enter the name of your company or organization, and edit the text as needed.
- Click Save and Continue.
![Standard Registration Questions section with [INSERT COMPANY NAME HERE] option selected](https://gotohelp.webcasts.com//uploads/images/gallery/2022-05/ewzokyF1OsI3745q-registration-emailconsent-croppedsimplify.png)
The following example includes the marketing consent option and additional links.
To find registrants who opted in to email communications:
Use the Audience Details report to retrieve a current list of people who opted in to receive email communications. You can run the report for a single event or for multiple events.
- At the top of the Webcast Admin portal, click Reports.
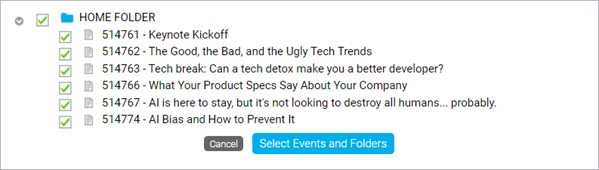
- On the Report tab, under Selected Events, click Add Events/Folders.
- Select the event or portal and then click Select Events and Folders.
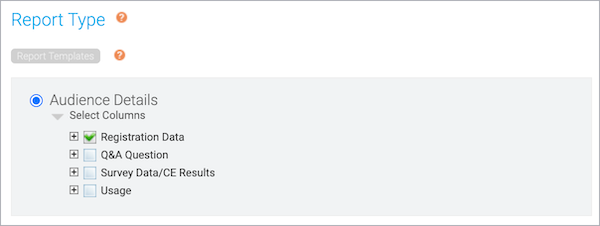
- On the Reports tab, under Report Type, select Audience Details, click Select Columns, and then select Registration Data. Choose the data to include in the report.

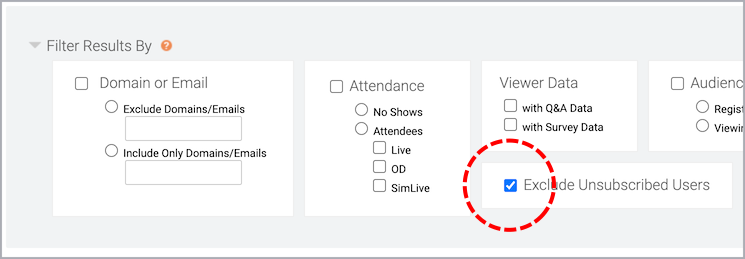
- Expand the Filter Results By section and select Exclude Unsubscribed Users.

- Click Run My Report.
Allow people to attend an event without registering
If you do not want to collect any information from attendees, set up the event with no registration form and allow people to attend anonymously. To allow attendees to access the event even faster, you can also have them bypass the landing page when they click the event link and join the event immediately.
Without a registration form:
- Information about individual attendees will not be available in registration reports
- Viewing data will not be available in event reports
- You cannot send event reminders and follow-up emails to attendees
- Attendees will appear in reports with a generic placeholder email address, such as guest#######@webcasts.com
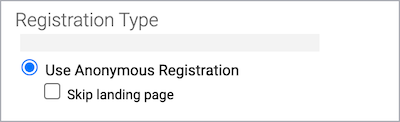
To hide the registration form:
- On the left panel, click the Registration tab.
- Under Registration Type, select Use Anonymous Registration.

- Optional. Select Skip landing page to have attendees bypass the landing page.
- Click Save and Continue.
Auto-fields for emails
Jump to: Auto-field Reference | Registrant Auto-fields
On the Emails & Marketing tab, you can enable confirmation, reminder, and follow-up emails for an event. By default, the emails include the event title, the event date and time, duration, and the event link. The system uses auto-fields - that is, placeholders or variables - to pull in these specific details. The benefit of auto-fields is that they automatically update when you make any changes to your event title or scheduling on the Event Settings tab.
Note: For attendee portals, the registration confirmation email includes the portal URL.
To customize the information in an email, go to the Email & Marketing tab, select the type of email to enable, and then select Send My Custom Message. Available auto-fields are listed below the text editor.
Auto-field Reference
The format of an auto-field is __AUTOFIELD__ (the auto-field in ALL CAPS with two underscores before and after).
The following table explains the available auto-fields and the text they display.
| Auto-field | Description |
|---|---|
| __TITLE__ | Event title |
| __DATE__ | Scheduled date |
| __TIME__ | Scheduled time |
| __DURATION__ | For Live events. The scheduled duration of the event |
| __EVENTLINK__ | Event URL |
| __EVENTPASSWORD__ | Registration and login password (if enabled) |
| __GOOGLEREMINDERBUTTON__ | Add to Calendar button. Creates a new event in Google Calendar. |
| __GOOGLEREMINDER__ | The URL of the Google calendar reminder. Creates a new event in Google Calendar. |
| __REMINDERBUTTON__ |
Add to Calendar button. Downloads an ICS file with event details. ICS files are a universal calendar format that can be read by Microsoft Outlook, Google Calendar, and Apple Calendar. |
| __REMINDER__ | The URL of the ICS calendar reminder. Downloads an ICS file with event details. |
| __REMINDERBUTTON1__ | Add to Calendar button for the first custom calendar reminder |
| __REMINDER1__ | The URL of the first custom calendar reminder. Downloads an ICS with event details |
| __UNSUBSCRIBEBUTTON__ | An HTML link that says Unsubscribe. Opens a confirmation page for the recipient to unsubscribe from emails. |
| __UNSUBSCRIBE__ | The full URL behind the Unsubscribe link |
Registrant Auto-fields
You can personalize emails by including details captured when an attendee registers for an event or portal. Make sure the fields you want to use are required on the registration form. You can include any of these standard registration fields.
- __TITLE__
- __FNAME__
- __LNAME__
- __COMPANY__
- __ADDRESS1__
- __ADDRESS2__
- __CITY__
- __STATE__
- __COUNTRY__
- __POSTALCODE__
- __PHONE__
- __MOBILE__
- __FAX__
Auto-fields for event landing pages
Jump to: Auto-field reference | Custom calendar reminders
By default, the landing page includes the event title, the event date and time, and a calendar reminder button. It uses auto-fields - that is, placeholders or variables - to pull in these specific details. The benefit of auto-fields is that they automatically update when you make any changes to your event title or date on the Event Settings tab.
To customize information on the landing page, scroll to the Customize Landing Page Content section and open Landing Page Content. Available auto-fields are listed below the text editor.
Auto-field reference
The format of an auto-field is __AUTOFIELD__ (the auto-field in ALL CAPS with two underscores before and after). The following table explains the available auto-fields and the text they display.
| Auto field | Description |
|---|---|
| __TITLE__ | Event title |
| __DATE__ | Scheduled day, date, and time |
| __DURATION__ | For Live events. The scheduled duration of the event |
| __REMINDERBUTTON__ | Add to Calendar button |
| __REMINDER__ | The URL of the calendar reminder. Downloads an ICS with event details |
| __REMINDERBUTTON1__ | Add to Calendar button for the first custom calendar reminder |
| __REMINDER1__ | The URL of the first custom calendar reminder. Downloads an ICS with event details |
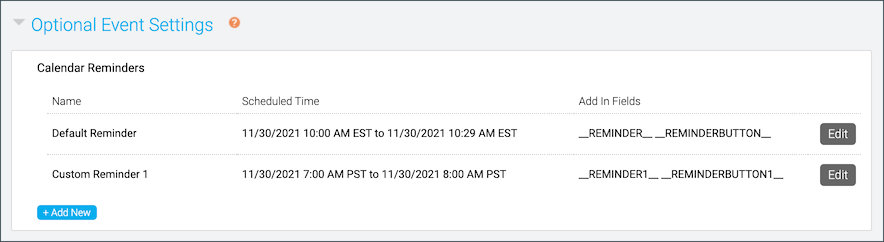
Custom calendar reminders
Live events have a built-in calendar reminder that downloads a calendar file with the scheduled date and time, event URL, and other information. You can set up additional calendar reminders for the event. On the Event Summary tab, open Optional Event Settings and click Add New . Auto-fields are created for each new calendar reminder, with a number appended.
Bulk registration for an event
Add-on. Please contact your sales representative for additional information.
With bulk registration, you can register hundreds or thousands of attendees for an event at one time. Set up your registration form first, then upload a spreadsheet with columns for each registration question on the form (attendee names, email addresses, etc.). To learn more about setting up the registration form, see Set up the registration form for an event.
Notes:
- Bulk registration doesn’t send a registration confirmation email. Set up a reminder email to send event details to registrants.
- You can view the registrant data you uploaded in the Audience Details report. To learn more about running reports, see Run event reports.
- You can't make changes to registrant data or unregister someone once you upload the file.
Upload file requirements
Create a spreadsheet and enter registration details for each attendee you want to register.
- Supported formats include CSV, TSV, TXT, XML, XLS, XLSX
- Limit the number of registrants per upload to 2,000 or less
- Include one column for each registration field on your registration form
- For standard registration questions, label columns with the Type label

- For custom registration questions, label the columns the Report Column Title you set up

- For standard registration questions, label columns with the Type label
- For each registrant, complete all fields that you required in the registration form. Required fields can't be blank.
- Email address is always required. Each registrant's email address must be unique. Duplicate email addresses are not accepted.
- Plain text should be used. Special characters, including commas, are not supported.

Register attendees
To upload a registration list:
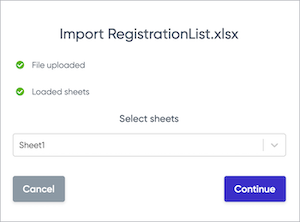
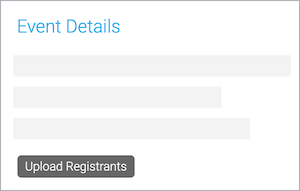
- On the Event Summary tab, in the Event Details section, click Upload Registrants.

- On the Viewer Registration Data window, click Upload data from file to select the spreadsheet and upload it.
- Select the sheet you want to import the data from and click Continue.
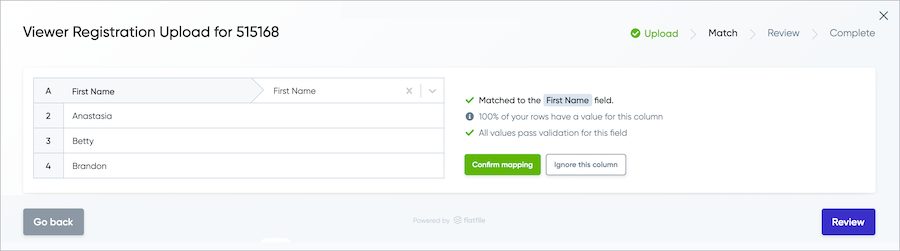
- The uploader detects the header row in the spreadsheet and matches each column to a field on the registration form. Confirm the header row and then confirm that each column is mapped correctly.
To not include a data column, click Ignore this column.

- Click Review.
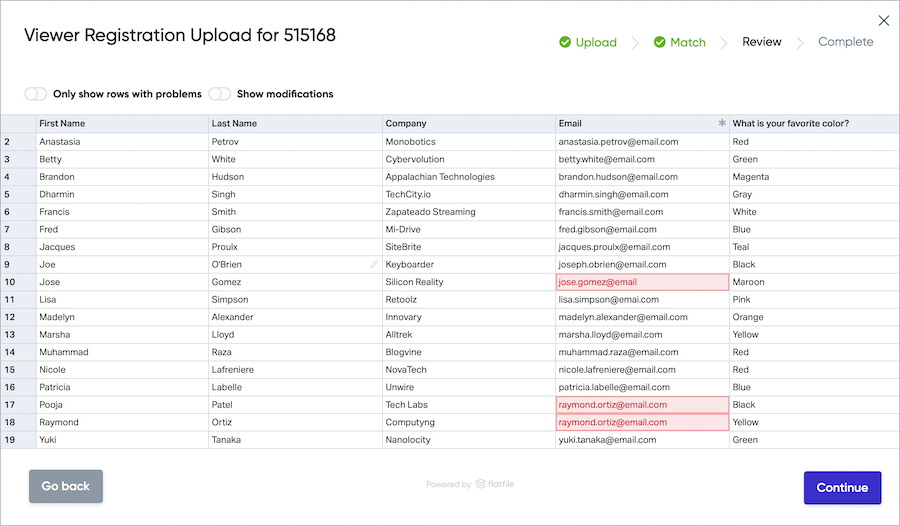
- Correct any errors and edit registrant information before submitting. To only view errors that need to be corrected, set the Only show rows with problems option to ON.
Important: You can't make changes to registrant data after you submit it.
- Click Continue.
- A message asks if you're ready to submit the data. Click Yes.
The registrant list is loaded. When finished, a confirmation message shows the number of successful and failed registrations, and the attendees that weren't registered because their email address was already registered.
- Click Ok.


Embed a webcast in another website
You can embed your webcast in another website using an iframe element. Depending on your desired setup, you can customize the embed code to show the webcast player immediately or require viewers to register before loading the webcast player. This article includes embed code examples and iFrame and webcast player parameters that can be used to customize how the webcast displays.
Support is not able to assist in customizing code. Any customization is the responsibility of the hosting party.
Jump to: Examples | iFrame Parameters | Webcast Player Parameters
Examples
Example #1 - Embed the event
Use the following sample code to embed your webcast. Replace the event URL with your Event URL.
If your event is set up with registration required, the event's landing page with registration form is displayed and each attendee must register before the webcast player displays. Reporting data for individuals is available.
    <iframe src="
    https://event.webcasts.com/starthere.jsp?ei=1234567&tp_key=bbcffdef6c
    " name="viewer" allow="autoplay" allowfullscreen="true" width="800" height="600" scrolling="no" style="overflow:hidden;" marginheight="0" marginwidth="0" frameborder="0"></iframe>
Example #2 - Let attendees bypass registration
If your event is set up with registration required, you may want to bypass the registration form when the webcast is embedded in another website.
Because attendees will not be required to register to view the event, reporting data on individuals will not be available. If you customize the event's registration form for viewers accessing the event link directly, you will need to customize the embed code to include any additional parameters in the Event URL.
Use the following sample code to embed your webcast and bypass the registration step. In this example, the registration form has four required fields (First Name, Last Name, Company, and Email address); the query parameters fill the required fields with placeholder information. Replace the event URL with your event URL. You can also need to adjust other parameters of the iframe to fit your requirements.
    <iframe src="
    https://event.webcasts.com/starthere.jsp?ei=1234567&tp_key=bbcffdef6c
    &fname=FirstName&lname=LastName&company=CompanyName&email=Email@Address.com
    " name="viewer" allow="autoplay" allowfullscreen="true" width="800" height="600" scrolling="no" style="overflow:hidden;" marginheight="0" marginwidth="0" frameborder="0"></iframe>
Example #3 - Embed the event in a responsive (resizable) iframe
The previous examples set the size of the iFrame to 800 x 600 px. This example sets up basic styling for a responsive "container" to hold the iFrame with the event (notice that the <iframe> code does not set a height or width). The code may need to be customized based on your requirements. This example can be updated to bypass the registration process using the instructions above.
Replace the event URL with your Event URL. You can also need to adjust other parameters of the iframe to fit your requirements.
    <!DOCTYPE html>
    <html>
    <head>
    <title>Responsive iframe example</title>
    <meta name="viewport" content="width=device-width" />
    <style>
    .wrapper {
     	width: 90%;
    	height: 90%;
    	margin: 0 auto;
    	min-width: 319px;
    }
    .resp-container {
       	position: relative;
       	overflow: hidden;
 		padding-top: 56.25%;
    }
    .resp-iframe {
  		position: absolute;
		top: 0;
		left: 0;
		width: 100%;
		height: 100%;
		overflow:hidden;
		border: 0;
     }
    @media only screen and ( max-width: 769px){
        .wrapper{
            width: 100%;
         }
    }
    </style>
    </head>
    <body>
    <div class="wrapper">
    <div class="resp-container">
    <iframe class="resp-iframe" src="
    https://event.webcasts.com/starthere.jsp?ei=1234567&tp_key=bbcffdef6c
    " scrolling="no" allow="autoplay" allowfullscreen="true"></iframe>
    </div>
    </div>
    </body>
    <!-- gesture="media" -->
    </html>
iFrame Parameters
Use standard iframe parameters to customize the iframe used to contain the event. Available options:
- name="X" - Specifies a name for the iframe
- allow="autoplay" - Allows for auto playback of the event within the iframe
- allowfullscreen="true" - Allows you to expand the video to full-screen
- width="X" - Specifies the width (in pixels) of the iframe
- height="X" - Specifies the height (in pixels) of the iframe
- scrolling="no" - Specifies whether or not to display scrollbars in the iframe
- style="X" - Specifies the style elements of the hosted content
- marginheight="X" - Specifies the top and bottom margins of the content of the iframe
- marginwidth="X" - Specifies the left and right margins of the content of the iframe
- frameborder="X" - Specifies whether or not to display a border around the iframe
Webcast Player Parameters
Use the optional &tp_special parameter to hide standard buttons and messages from the player, set the webcast player to fill the entire iFrame, and set the view when Meeting Room view is enabled for the event.
Hide webcast player elements
Add &tp_special=# to the end of the event URL, where # is the element you want to hide. For example, to hide the lobby message:
https://example.webcasts.com/starthere.jsp?ei=1234567&tp_key=0999&tp_special=8The following table explains available options.
| Enter this value | To hide the... |
|---|---|
| &tp_special=2 | Help button |
| &tp_special=4 | Exit button |
| &tp_special=8 | The lobby message displayed before an event begins |
To hide more than one element, add their values together. For example, to hide the Help (2) and Exit (4) buttons, add &tp_special=6 (2+4=6). The following table explains available options.
| Enter this value | To hide the... |
|---|---|
| &tp_special=6 | Help and Exit buttons |
| &tp_special=10 | Help button, lobby message |
| &tp_special=12 | Exit button, lobby message |
| &tp_special=14 | Help button, Exit button, lobby message |
Have the webcast fill the entire iframe
The &tp_special=64 parameter makes the embedded video player adjust to fill the entire available iframe space for a more seamless embedded experience. This applies only to events with high-resolution players (480p or 720p) and no primary tabs for slides, surveys, or custom player tabs.
For example:
https://example.webcasts.com/starthere.jsp?ei=1234567&tp_key=0999&tp_special=64Meeting Room View
If Meeting Room View is enabled for the event, by default attendees are given a choice of viewing the standard full webcast or using the Meeting Room View. You can bypass that screen and send them directly to the Meeting Room View or the standard webcast player. Available options are 16 and 32:
- &tp_special=16 - Meeting Room View
- &tp_special=32 - the standard webcast player
Mute playback (for testing)
The &tp_player=1 option lets you mute the webcast audio. Attendees can unmute it in the player. This is primarily for use in load balance testing, where you would have several instances of the webcast running at one time and want to mute the audio.
For example:
    https://example.webcasts.com/starthere.jsp?ei=1234567&tp_key=0999
    &tp_player=1
Limit presenter actions in the Live Studio
Control what your presenters see and what they can interact with in the Live Studio during the event. By default, all presenters can see the:
- Start Webcast and End Webcast buttons
- Audience count and audience list
- Webcast time alerts when the event is about to end
- Phone bridge alerts
- Q&A queue
You can hide the buttons, audience counter, alerts, and the Manage Q&A section for all presenters at any time.
Note: To prevent presenters from accidentally starting or ending the event, we recommend hiding the Start Webcast and End Webcast buttons.
To limit presenter actions:
- Sign in to the Webcast Admin portal and edit the event.
- On the Event Summary tab, next to the Guest Administrators section, click Set Guest Admin Permissions.

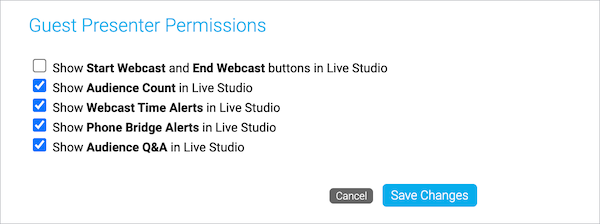
- In the Guest Presenter Permissions window, clear the check boxes next to the buttons, alerts, or areas you don't want presenters to have access to.

- Click Save Changes.

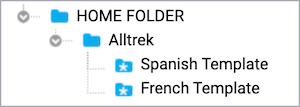
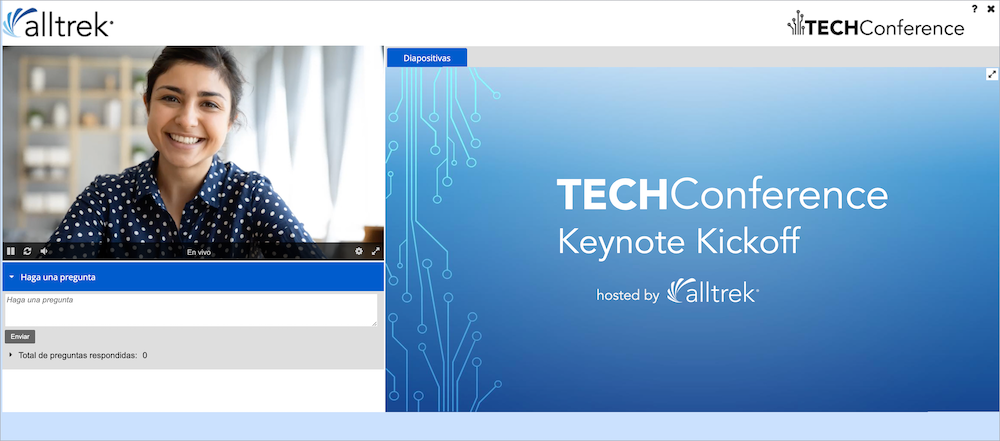
Set up an event in another language
Language templates contain many common text elements translated from English to other languages. If you're hosting an event in another language, we can assign a language template to a specific folder in your account. When you create new events in the folder, the template automatically translates the text on the registration page and the audience event window to that language.
Note: Only new events created in the language template folder are translated. Events moved into the folder from another folder are not translated.
To have language templates set up for your account, contact Support.
Jump to: Translated elements | Available languages | Examples
Translated elements
The following table shows the elements that are translated on the registration page and audience event window.
Notes:
- Language templates don't translate the event __TITLE__ or the __DATE__ auto-fields on the registration page. To customize the title and date, enter them in the Landing Page Content section. To learn more, see Customize the event title and date | Bar layouts or Customize the event title and date | Open layouts.
- Language templates only set the language for the registration page and the audience event window. They don't set the language for the Webcast Admin portal, the Live Studio, or the editing studio.
| Page | Elements translated |
| Registration page | Login form fields Meeting Room View page Registration form fields |
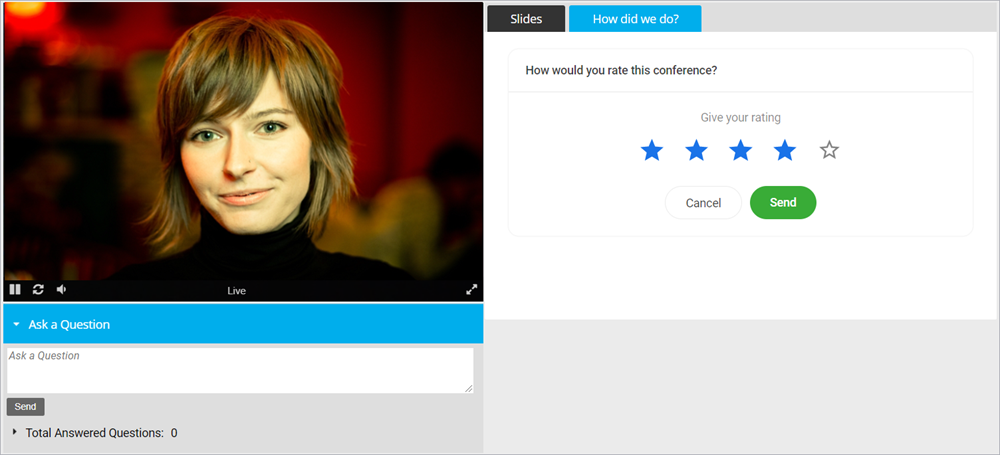
| Event window | Event resources tab Q&A tab Slides tab Video player Welcome message |
Available languages
You can request templates in the following languages:
- English, American
- Chinese, Simplified
- Chinese, Traditional
- Czech
- Danish
- Dutch
- French
- French, Canadian
- German
- Italian
- Japanese
- Korean
- Polish
- Portuguese, Brazilian
- Romanian
- Spanish
- Turkish
- Vietnamese
Examples
The following examples show an event created within a folder with a Spanish language template. Notice that the Add to Calendar button, registration fields, buttons, and tabs and other text on the event window are in Spanish.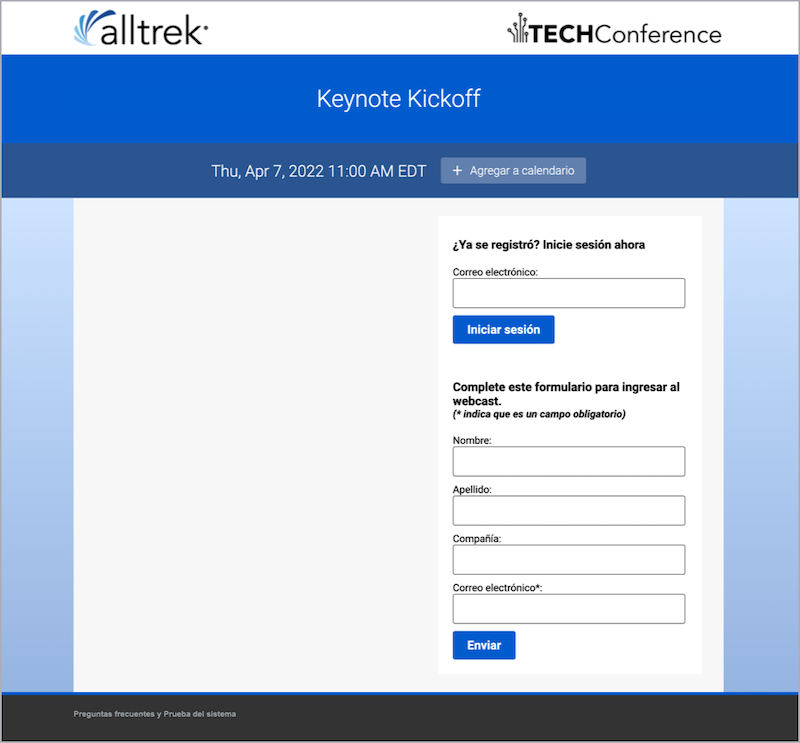
Set up Guest Administrator accounts
After scheduling an event, invite your presenters, moderators, and schedulers and give them Guest Administrator access to allow them to manage aspects of the event. To create Guest Administrator accounts, you must create Guest Admin Access Types. Access Types allow you to set permissions for multiple Guest Administrator accounts at once. For each Access Type, you can allow Guest Administrators to upload event content, edit the On-Demand event or replay, deliver the event, manage Q&A, and generate event reports.
Note: To limit what Guest Admins can see and do during the Live event, see Limit presenter actions in the Live Studio.
There is no maximum number of Guest Administrators that can join the Live Studio for an event. However, if the event is using Video Bridge or Telephone as the acquisition source, only 20 presenters will be able to join the bridge.
To create Access Types and Guest Admin accounts:
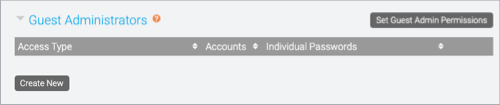
- On the Event Summary page, select Guest Administrators and under Access Type, click Create New.

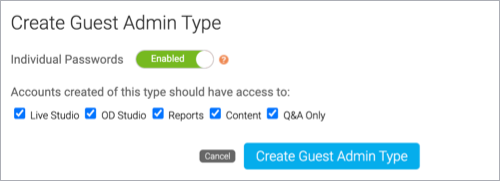
- In the Create Guest Admin Type window, keep individual passwords enabled.
Note: You cannot create individual Guest Admin accounts if you disable Individual Passwords. Instead, presenters will share a PIN and use it to sign in to the event.
- Select the event activities you want to give Guest Admins access to. You can select:
- Live Studio to join and deliver the Live event.
- OD Studio to upload media clips and headshots to the On-Demand event or replay, and edit the event timeline.
- Reports to generate Audience Details and Event Analytics reports for the event.
- Content to upload slides, event resources, and headshots (audio events only).
- Q&A Only to manage Q&A for a Live or Simulated Live event.

- Click Create Guest Admin Type.
- In the Manage Guest Admin Type window, click either:
- Create Individual Accounts to set up accounts for each of your Guest Admins. Enter their names and email addresses. Click + Add Another Account to create more accounts. Select who you want to send email notifications to and the email content you want to send, and click Create Accounts and Send.
Note: By default, emails are sent to yourself and to individual Guest Admins. Select ONLY send to me to send the email to yourself. Click Send My Custom Message to edit the email content.

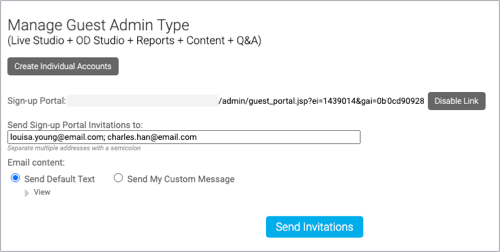
- Enable Sign-up Portal to allow Guest Admins to register for the event and create their own accounts. In the Send Sign-up Portal Invitations to box, enter the email addresses of the people you want to make Guest Admins and click Send Invitations.
- Create Individual Accounts to set up accounts for each of your Guest Admins. Enter their names and email addresses. Click + Add Another Account to create more accounts. Select who you want to send email notifications to and the email content you want to send, and click Create Accounts and Send.
- Repeat these steps to add additional accounts with different access levels. Each Access Type you create displays in the Guest Administrators section where you can add new and manage existing accounts. To add new Guest Admin accounts to an Access Type, click Manage Admins or the Edit button.
After you've created the accounts, Guest Admins receive an email with a link to the Guest Admin site where they can manage the event.


To update a Guest Admin account:
- In the Guest Administrators section, next to an Access Type, click Manage Admins.
- Click the View Existing Accounts tab.
- Next to a Guest Admin account, you can click the:
- Reset Password to send a new Guest Admin email with a new, randomly generated password.
Note: Existing passwords cannot be resent. Accounts that require resending login details will receive a new password from the system and the old password will no longer be valid.
- Edit button to change the name on the account.
- Delete button to remove the account from the Access Type.
- Reset Password to send a new Guest Admin email with a new, randomly generated password.
Set up the registration form for an event
The event landing page includes a registration form. You can use the standard registration form questions, or create your own custom questions. You can make the questions optional to answer, or require registrants to answer the questions to complete their registration. The information you collect from registrants is available in event reports.
To learn more about creating custom registration questions, see Add custom questions to a registration form. You can also allow people to attend an event without registering.
To set up the registration form:
- Sign in to the Webcast Admin portal and edit the event.
- On the left panel, click the Registration tab.
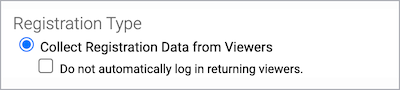
- Under Registration Type, select Collect Registration Data from Viewers to display the registration form on the event landing page.

- Optional. Select Do not automatically log in returning viewers to require returning registrants to enter their email address to join the event.
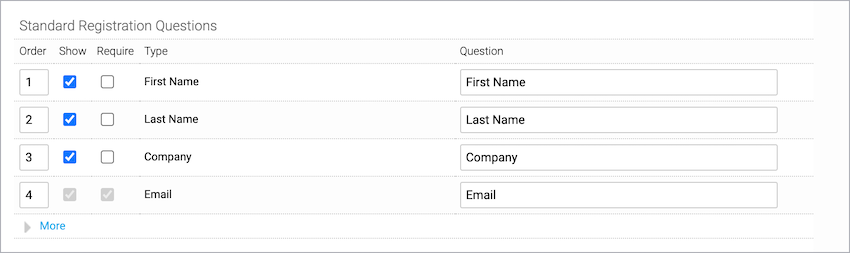
- The first four fields are displayed. Under Email, click More to display the rest of the standard fields.
Note: By default, First Name, Last Name, Company, and Email are included on the form. You can set the name and company fields to required or hide them. Email is required for registration and cannot be hidden.
- Choose which fields to include (and the information to capture from registrants):
- Select Show to include a field
- Select Require to require registrants to complete the field
- Optional. Under Question, change the field label (for example, you could change Email to Email Address).

- To change the order of the fields on the registration form, in the Order column, delete the numbers and enter new numbers.
- Click Save and Continue.
Accessing events and attendee portals in China
Due to internet restrictions on China, some viewers may have trouble accessing the standard Event URL for a presentation. For viewers in China, the Event URL can be updated to allow them access to a local Chinese server. Please refer to the example below, which has the required update highlighted. The link needs to be updated to replace "webcasts.com" with "cnwebcasts.cn".
Standard Event URL Example: https://event.webcasts.com/starthere.jsp?ei=1283888&tp_key=2760b09e10
Chinese Event URL Example: https://event.cnwebcasts.cn/starthere.jsp?ei=1283888&tp_key=2760b09e10
This update will work for all Live, On-Demand, or Simulated Live presentations. Both links will point to the same event and all users show up in one report. You will not need to run two events, just distribute the appropriate link to your audience based on their viewing location.
This also works for portals. When you provide a China-based link for the portal, the change flows down to all linked events. All events accessed from that alternate portal link automatically go to a China-based event URL.
Send follow-up emails for an event
Schedule one or more emails to be sent after the event ends to promote future events, gather feedback, and reconnect with attendees. You can send emails to registrants who attended the Live event, attended the Simulated Live event, watched the On-Demand event (Live event replay), did not attend the event, or to everyone. You can also customize the subject and the body of the email and change the sender name and reply-to address.
Note: To ensure that the registration data is up to date and attendees receive the emails, schedule follow-up emails at least one hour after the event concludes.
Schedule and send follow-up emails
To schedule follow-up emails:
- Sign in to the Webcast Admin portal and edit the event.
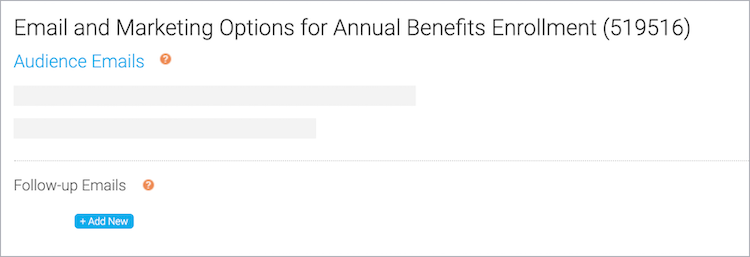
- On the left panel, click the Email & Marketing tab.
- In the Audience Emails section, under Follow-up Emails, click + Add New.
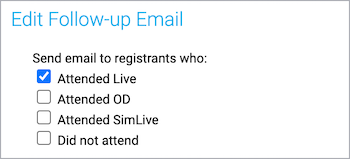
- In the Edit Follow-up Email window, select who you want to send the email to. Attended Live is selected by default.
- Optional. Delete the placeholder text in the From Name, Reply-To Email, and the Email Subject fields and enter new text.
- At the right side of the text editor, click </> to switch to code view.
- Delete all the placeholder code.
- Paste your custom code or click </> again to switch back to the text editor view to add text, images, or links.
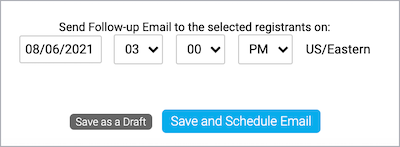
- Click Schedule Email, select the date and time you want to send the email, and then click Save and Schedule Email. You can also optionally save the email as a draft and schedule it later.
- Click Save and Continue.
Preview your work
You should always send yourself the email before sending it to attendees.
To preview the follow-up email:
- In the Webcast Admin portal, edit the event.
- On the left panel, click the Email & Marketing tab.
- In the Audience Emails, next to the email you scheduled, click Edit.

- Under the text editor, next to Send a test email to, enter your email.

- Click Save and Schedule Email.
- Click Save and Continue.

Send registration confirmation emails for an event
Send a registration confirmation email to attendees after they register for the event. By default, registration confirmation emails are plain text messages with the event title, date, time, duration, URL, and a link to unsubscribe from email messages. You can use the text editor and customize the message, including the sender name and email and email subject.
Note: Help registrants remember your event with an Add to Calendar button or link in the email. You can include links for Outlook and Google calendars. For more information, see Auto-fields for emails.
To send registration confirmation emails:
- Sign in to the Webcast Admin portal and edit the event.
- On the left panel, click the Email & Marketing tab.
- In the Audience Emails section, select Enable Registration Confirmation Email.
- Under Send Default Text, click View to review the default message. To customize the message, select Send My Custom Message and use the text editor to add text, images, and more.
- You should always send yourself the email before sending it to registrants. Under the text editor, next to Send a test email to, enter your email address.
- Scroll to the bottom of the page and click Save and Continue.
Auto-fields for emails
On the Emails & Marketing tab, you can enable confirmation, reminder, and follow-up emails for an event. By default, the emails include the event title, the event date and time, duration, and the event link. The system uses auto-fields - that is, placeholders or variables - to pull in these specific details. The benefit of auto-fields is that they automatically update when you make any changes to your event title or scheduling on the Event Settings tab.
Note: For attendee portals, the registration confirmation email includes the portal URL.
To customize the information in an email, go to the Email & Marketing tab, select the type of email to enable, and then select Send My Custom Message. Available auto-fields are listed below the text editor.
Auto-field Reference
The format of an auto-field is __AUTOFIELD__ (the auto-field in ALL CAPS with two underscores before and after).
The following table explains the available auto-fields and the text they display.
| Auto-field | Description |
|---|---|
| __TITLE__ | Event title |
| __DATE__ | Scheduled date |
| __TIME__ | Scheduled time |
| __DURATION__ | For Live events. The scheduled duration of the event |
| __EVENTLINK__ | Event URL |
| __EVENTPASSWORD__ | Registration and login password (if enabled) |
| __GOOGLEREMINDERBUTTON__ | Add to Calendar button. Creates a new event in Google Calendar. |
| __GOOGLEREMINDER__ | The URL of the Google calendar reminder. Creates a new event in Google Calendar. |
| __REMINDERBUTTON__ |
Add to Calendar button. Downloads an ICS file with event details. ICS files are a universal calendar format that can be read by Microsoft Outlook, Google Calendar, and Apple Calendar. |
| __REMINDER__ | The URL of the ICS calendar reminder. Downloads an ICS file with event details. |
| __REMINDERBUTTON1__ | Add to Calendar button for the first custom calendar reminder |
| __REMINDER1__ | The URL of the first custom calendar reminder. Downloads an ICS with event details |
| __UNSUBSCRIBEBUTTON__ | An HTML link that says Unsubscribe. Opens a confirmation page for the recipient to unsubscribe from emails. |
| __UNSUBSCRIBE__ | The full URL behind the Unsubscribe link |
Registrant Auto-fields
You can personalize emails by including details captured when an attendee registers for an event or portal. Make sure the fields you want to use are required on the registration form. You can include any of these standard registration fields.
- __TITLE__
- __FNAME__
- __LNAME__
- __COMPANY__
- __ADDRESS1__
- __ADDRESS2__
- __CITY__
- __STATE__
- __COUNTRY__
- __POSTALCODE__
- __PHONE__
- __MOBILE__
- __FAX__
Send reminder emails for an event
You can send one or more reminder emails to people who registered for your event. By default, a reminder is sent 24 hours before the scheduled start time of your event. You can change the date and time the reminder will be sent and also schedule additional reminder emails. For example, schedule one reminder for a week before the event and a second reminder for the morning of the event.
Event reminders are plain text messages with the event title, date, time, duration, URL, and a link to unsubscribe from email messages. You can use the text editor and customize the message, including the sender name and email and email subject.
Notes:
- Help registrants remember your event with an Add to Calendar button or link in the email. You can include links for Outlook and Google calendars. For more information, see Auto-fields for emails.
- The system sends the same reminder email for each of the scheduled dates and times. To send different reminder emails, create your reminders as follow-up emails, schedule them to send before the event starts, and select Did not attend to target registrants. For more information, see Send follow-up emails for an event.
To schedule reminder emails:
- Sign in to the Webcast Admin portal and edit the event.
- On the left panel, click the Email & Marketing tab.
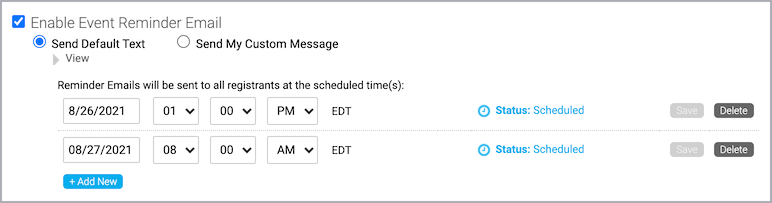
- In the Audience Emails section, select Enable Event Reminder Email.
- Under Send Default Text, click View to review the default message. To customize the message, select Send My Custom Message and use the text editor to add text, images, and more.
- To send the reminder more than one time, click + Add New and select the date and time to send it.
- You should always send yourself the email before sending it to registrants. Under the text editor, next to Send a test email to, enter your email address.
- Scroll to the bottom of the page and click Save and Continue.

Event Content
About Q&A
Allow attendees to submit questions during a Live, Simulated Live, or On-Demand event or through an attendee portal.
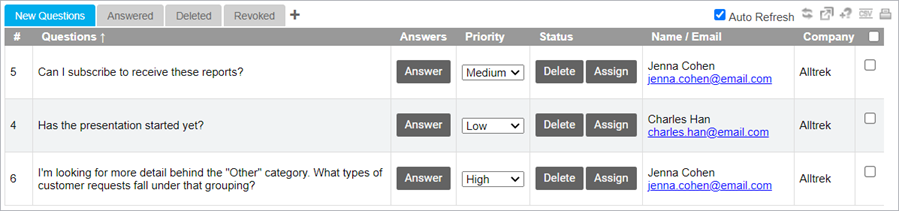
For Live events, Simulated Live events and attendee portals, you can use the Q&A queue to answer questions, prioritize questions to decide which ones you'll answer first, edit answers, and delete questions you won't answer. You can also assign questions to specific presenters or groups by creating additional tabs and assigning questions to them from the New Questions tab. The Q&A queue refreshes automatically as questions are submitted and answered. Questions are hidden from the audience until they're answered.
The numbers next to questions show the order in which they were asked. Use the tabs to monitor new questions as they arrive or to view lists of questions that were answered, deleted, or revoked (sent back to be answered again). Click any of the column headers to sort the questions.
At the top right of the Q&A queue are additional options. You can manually refresh the queue, open it in a new window (from the Live Studio), add new questions to the queue, save the list of questions from the tab you're on as a CSV file, and print them.
For On-Demand events, you can have questions sent to specific email addresses and reply to the email to answer the question. You can also optionally have questions sent by email for Live events.
After the event, run an Event Analytics report and select Q&A to view all submitted questions, the attendees who asked the questions, and presenter answers.
Add a third-party video to a custom tab
Enhance your events by including videos that viewers can play at any time. You can include YouTube, Vimeo, or Brightcove videos. During the event, the videos display in tabs on the right side of the event window, next to the video stream or headshots. The videos play in the tab instead of in an overlay window.

Example Code
Use the following sample code to embed your video. Replace INSERT YOUR LINK HERE with the link found in the video player's embed code.
<!DOCTYPE html>
<html>
<head>
<title></title>
</head>
<body style="min-height: 405px;">
<iframe style="position:absolute;top:0;left:0;border:none;" scrolling="no" width="640" height="360" src="INSERT YOUR LINK HERE" frameborder="0" allowfullscreen="">
</body>
</html>
This is an example of a YouTube video's embed code and link. Only copy the URL.
<iframe width="560" height="315" src="https://www.youtube.com/embed/7s5qAuUZexw" title="YouTube video player" frameborder="0" allow="accelerometer; autoplay; clipboard-write; encrypted-media; gyroscope; picture-in-picture" allowfullscreen></iframe>
Add videos to your event
To add a video in a custom tab:
- Sign in to the Webcast Admin portal and edit the event.
- On the left panel, click the Event Content tab.
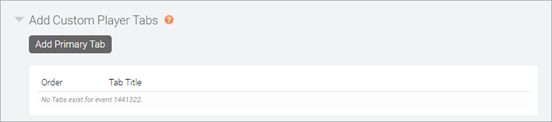
- Under Optional Content, expand the Add Custom Player Tabs section and click Add Primary Tab.

- In the Manage Tab Content window, enter a name for the tab.
- At the top right side of the text editor, click </> to switch to code view.
- Delete all the placeholder code.
- Copy the example code and paste it into the editor. Replace INSERT YOUR LINK HERE with your video link.
Note: For the video to work properly, the link must begin with https:// and contain one of the following expected domains: players.brightcove.net, vimeo.com, player.vimeo.com, youtube.com, youtu.be.

- Click Save Changes to save the coding. Then click Save and Continue to save changes to the event content.
Add third-party tools to an event
Enhance your events by including interactive tools like captioning, polling, surveys, real-time Q&A, and more. Add a custom player tab to your event and use the embed code from third-party apps and platforms. During the event, the tools display in tabs on the right side of the event window, next to the video stream or headshots.
Note: This requires that you have an account with the app or platform that provides the polls, real-time Q&A, surveys, or other interactive tools that you want to incorporate in your event. For more information, see Supported third-party tools.
Support is not able to set up, test, or manage third-party tools for self-service clients. If you would like someone to manage an end-to-end integration, please contact your sales representative to arrange a consulting package.
Jump to: Example Code | Add Third-party Tools
Example code
Use the following sample code to embed your third-party tool. Replace INSERT YOUR LINK HERE with the link found in your tool's embed code.
<!DOCTYPE html>
<html>
<head>
<title></title>
</head>
<body style="min-height: 405px;">
<iframe style="position:absolute;top:0;left:0;height: 100%; border: none;width:100%;" scrolling="no" src="INSERT YOUR LINK HERE" frameborder="0"></iframe>
</body>
</html>
This is an example of Conferences i/o's embed code and link. Only copy the URL.
<iframe src="https://help.cnf.io/sessions/mkta/#!/polls/cr6s" style="width: 100%; max-width: 400px; height: 600px;"> </iframe>
Add third-party tools to your event
To set up a third-party tool, find and copy the embed code from the app or platform and then paste it into a custom tab. Before the event, view the event and make sure the third-party tool works properly.
The webcast player does not interact or control the third-party tool or content. It uses the embed code provided by the vendor to retrieve the component you want to incorporate. For security reasons, the webcast player only connects to specific, "expected" domains for each tool. See Supported third-party tools for a list of tools and the expected domains.
To embed a third-party tool:
- Sign in to the Webcast Admin portal and edit the event.
- On the left panel, click the Event Content tab.
- Under Optional Content, expand the Add Custom Player Tabs section and click Add Primary Tab.
- In the Manage Tab Content window, enter a name for the tab.
- At the top right side of the text editor, click </> to switch to code view.
- Delete all the placeholder code.
- Copy the example code and paste it into the editor. Replace INSERT YOUR LINK HERE with the link found in your tool's embed code.
Note: For the third-party tool to work properly, the link must begin with https:// and the domain expected for the service.

- Click Save Changes to save the coding. Then click Save and Continue to save changes to the event content.


How do I create a certificate?
The system requires a .PDF file be uploaded, which will serve as the template that is customized and distributed to viewers that meet the certification requirements for your event. The PDF requires Forms be included to populate the viewer's name (First Name and Last Name fields need to be required on the Registration Form), the certificate title, the date the certificate was received and a unique certificate ID. These Forms need to be setup in using Adobe Acrobat and use the following formatting:
- __TITLE__ to populate the title entered in the Name of Certificate field.
- Note: If the Certification Method is set to Viewing Duration, the title of the event on the certificate is limited to 50 characters. Please use an abbreviated title if needed.
- Note: If the Certification Method is set to Viewing Duration, the title of the event on the certificate is limited to 50 characters. Please use an abbreviated title if needed.
- __NAME__ to populate the viewer's name. First and Last Name registration fields should be required on the Registration Form.
- __DATE__ to populate the date the certificate was received.
- __CERTID__ to populate a unique Certificate ID.
If you do not want to populate the Name, Date, Title and/or Certificate ID fields on each certificate, the forms can be set to invisible or the text can be set to match the certificate's background color, but forms are required.
Select the Download Sample PDF button in the setup for an example of how your certificate needs to be setup.
Overlay video specs and requirements
For Live, On-Demand, and Simulated Live events.
You can upload as many as 10 overlay videos to your event and share them with the audience. For Live events, you are limited to 10 videos whether you launch them inline or in overlay windows. For On-Demand and Simulated Live this limit is for overlay videos only.
We support all video resolutions and many file formats, but all videos are transcoded to MP4 for use in the event.
The bit rate videos are transcoded to depends on the original video bit rate. Videos that are:
- Above 1700 kbps are transcoded at 17000 kbps
- Between 800 to 1700 kbps are transcoded at the uploaded bit rate
- Below 800 kbps are transcoded at 800 kbps
Recommended specs
For the best video quality, upload videos that meet these recommended specs:
- File format: MP4
- Video codec: H264
- Video bit rate: 800 kbps
- Aspect ratio: 16:9 widescreen
- Audio codec: AAC
- Audio bit rate: 96 kbps/48 khz mono
Requirements
- Maximum 10 overlay videos per event
- Maximum 10 GB per video
- Supported file formats: 3GP, ASF, F4V, MKV, MOV, MP4, MPEG, MPG, WEBM, and WMV
- Must be at least 15 seconds long.
- Must include an audio track; the audio track can be silent, but videos without an audio track will not process successfully.
Additional notes
- Each video can be up to 10 GB. We recommend using a high-speed wired internet connection to avoid time-outs.
You could also transcode the file to a smaller file size or bit rate before uploading to improve the upload and processing time.
- Overlay videos are displayed at the native size of the file, but will stream to the audience at a maximum of 896 kbps.
You can upload videos of any resolution (for example, 1080p), but higher resolution videos may stream at a lower quality than you'd see on your computer. Before the event, review the quality of the uploaded video to make sure it meets your standards. For more information, see Share a video during a Live event.
PowerPoint Best Practices
General Best Practices
PowerPoint slides need to be uploaded in advance. Final slides should be uploaded at least 4 hours before your event, but we recommend uploading 24 hours in advance to ensure there is adequate time for processing and review.
Some advanced PowerPoint features are not recommended for use in your presentation. To optimize your slide decks for your Webcast presentation, please use the following as a guideline:
- Use PowerPoint 2007 or later to create your slides
- Save as a .PPT or .PPTX file
- Files are limited to 500 MB in size and 200 slides per deck.
- For Slide Size, use Standard (4:3) or Widescreen (16:9).
- Custom-sized slides will be converted, which may cause the content to be reformatted.
- Remove any "Read-Only" Restriction before uploading the file.
- Remove embedded fonts being used in the slide deck. See below for detailed instructions.
- Remove any password protection from your presentation before uploading the file to ensure the slides can be processed.
- Any security that is required for your presentation can be handled through a variety of other options.
- Do not embed or insert audio or video clips into your PowerPoint presentation.
- Since the platform allows you to speak to the slides in real-time as you present them, any audio clips embedded into your presentation will interfere with your viewers' ability to hear what you are saying on the presentation. Video clips can be added to your presentation as an Overlay video, ensuring that it is optimally displayed to your viewers. Gifs are not officially supported but may work. If your deck includes gifs, please review the slides after uploaded to confirm if the gifs processed correctly.
- When inserting objects into your presentation:
- Make sure to leave the Link box unchecked.
- Make sure that you are set to Insert (Not Link to File or Insert and Link).
- Do not link to external images or spreadsheets.
- Do not use tables created from versions of Excel older than Excel 2007
- Slides should be numbered starting at Slide 1.
- Decks numbered starting at Slide 0 will automatically be renumbered.
- Ungroup any SmartArt objects that may be grouped together. This will ensure that each object is processed and displayed correctly on the presentation.
- Try to keep the background one color and avoid fading or transitional backgrounds. These types of backgrounds do not always convert well and can become pixilated.
- Try to use graphics and backgrounds that use the RGB color palate. Graphics that use the RGB color palette will be displayed as you see them on the screen. The alternative is CMYK, which is used for printing graphics and may appear differently when converted.
- Make sure that the content of your slides is set to use only the defined slide area and does not run off the slide. This will ensure that it displays properly once it is converted.
- By default, the slide processors will always use the first Slide Master. Update the Slide Master order and remove any unused Slide Masters. This will ensure slides display properly once it is converted.
- If you encounter display or formatting issues with an uploaded slide deck, check "Process as Images (No animations)" below the PowerPoint Decks upload to convert the slides to static images. This option maintains the look of the slides but removes any animations included in the slide deck.
PowerPoint Fonts
- Font Size: Your font size should be at least 12 point or higher. Anything smaller could be difficult for the audience to read, even on full screen slides. Fonts must not contain a decimal place. Any decimals will be rounded up to the next whole number.
- Supported Fonts: A list of supported fonts can be accessed here: https://www.microsoft.com/typography/fonts/product.aspx?PID=157
- Custom Fonts: Custom fonts are allowed, but should only be used as necessary. If a custom font is required, please provide the font file(s) in .otf or .ttf format to your Production Manager (for managed events) or Support (for self-service events). Font files should be provided at least 24-hours before the start of the event and will require the PowerPoint presentation to be re-uploaded after the custom fonts have been installed.
- Licensed Fonts: Licensed fonts are not supported by our system. Please change them to another font or remove the license restriction before uploading the presentation.
PowerPoint Animations & Transitions
Most standard PowerPoint Animations are supported with the following exceptions :
- Emphasis Effects:
- Bold Flash
- Underline
- Grow with Color
- Style Emphasis
- Entrance Effects:
- Dissolve In
- Fly In
The platform does not support timed animations. Any animations should be set On Click. Please be sure to remove them from your presentation before uploading.
Most standard PowerPoint transitions are supported, with the following exceptions:
- Box
- Cube
- Doors
- Morph
- Page Curl
- Ripple
Reducing the Size of PowerPoint Files
High resolution images in PPT slides can greatly increase the size of a PowerPoint file when they are embedded within a slide. Here is a quick way to compress the images and reduce the file size substantially, without causing noticeable loss in image quality.
- Open the PowerPoint file.
- From the File menu, select Save As. When the Save As dialog pops up, click Tools to the left of the Save button, and click Compress Pictures.
- Depending on the version of PowerPoint you are using, follow the remaining instructions below.
PowerPoint 2007
- You will receive a dialog box. Click the Options button.
- On the Compression Settings dialog box, select "Automatically perform basic compression on save" and Delete cropped areas of pictures. Choose E-mail (96 ppi) minimize document size for sharing and Click OK.
- On the Compress Pictures dialog box, click OK.
PowerPoint 2010 or 2016
- On the Compress Pictures dialog box, click Delete cropped areas of pictures. Choose E-mail (96 ppi): minimize document for sharing and click OK.
Compression should take just a few seconds, but for files with many images, it could take up to a minute or two to process. Once complete, save the modified file and upload it.
Using Non-PowerPoint Files
Convey requires a PowerPoint file to be uploaded to an event. If you are using another program to create your presentation, refer to the instructions below for exporting the file to PowerPoint:
Keynote (Mac)
- Open the presentation and select File > Export To.
- Choose PowerPoint in the list of export options.
- Click Next and enter a name for the presentation.
- To choose where to save the presentation, click the Where pop-up menu, choose a location, then click Export.
- Open a file in Acrobat.
- Click on the Export PDF tool in the right pane.
- Choose Microsoft PowerPoint as your export format.
- Click Export.
- Name the PowerPoint file and save it in a desired location.
Prezi
- From Edit Mode, select the Share icon from the top menu. Then select Download as a PDF.
- When is ready, you will be prompted to save your Prezi as a PDF file.
- After selecting Save PDF, you will be prompted to name the PDF and choose where to save it. On both Windows and Mac, the default folder is Downloads.
- Once created, refer to the instructions above for converting the PDF to PowerPoint.
Removing Embedded Fonts
PowerPoint slides will need to have embedded fonts removed before the slides are uploaded to an event. Follow the steps below to remove embedded fonts:
- Open the PowerPoint file locally and select Remove Restricted Fonts when prompted.

- Click File > Save As. When prompted to save the file, select Tools (next to the Save button) and choose Save Options in the drop down.
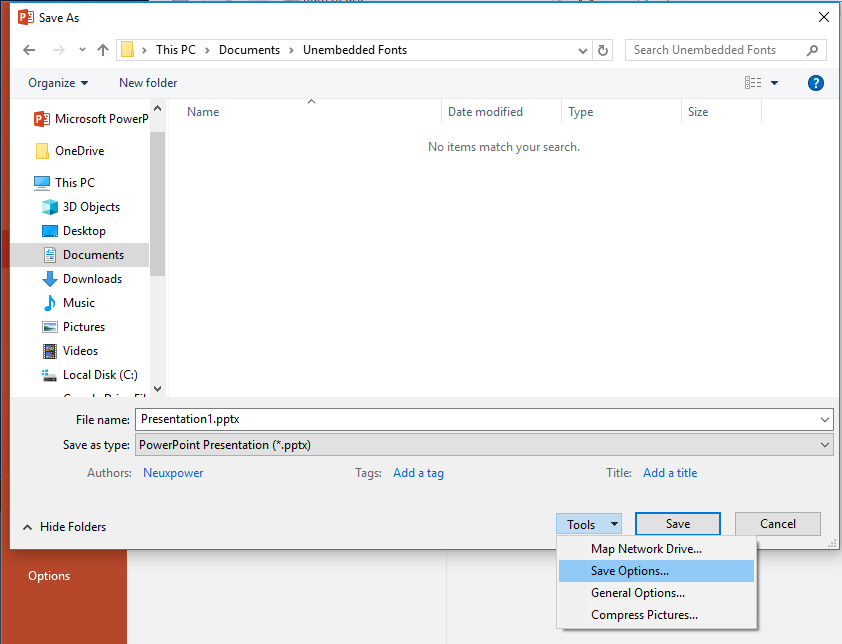
- Uncheck the Embed fonts in the file option under "Preserve fidelity when sharing this presentation".

If custom fonts are being used in the PowerPoint file and are already installed in the Webcast platform, the fonts will load correctly when the PowerPoint is uploaded to the platform. If the fonts are not already installed, the custom font will be converted to a similar font when the PowerPoint is uploaded. Contact Support to provide custom font files for use in your PowerPoint slides.
Last Minute Uploads
PowerPoint slides need to be uploaded in advance. Final slides should be uploaded at least 4 hours before your event, but we recommend uploading 24 hours in advance to ensure there is adequate time for processing and review.
If slides are uploaded after a user has joined the Live Studio, they will need to exit and re-enter the Live Studio to see the updated content. It is recommended to have all presenters manually re-enter the Live Studio once it is confirmed the new slides are available. If presenters do not re-enter the Live Studio after new slides are uploaded, they will see an error message when the "Start Webcast" button is clicked and be forced to refresh, which may impact the start of the event while presenters reconnect.

Primary media clip specs and requirements
You can upload as many media clips to your event as you like and include them in your On-Demand or Simulated Live event. For events broadcasting video, you can upload video clips. For events broadcasting by telephone, you can upload audio clips.
Recommended specs
For the best quality, upload clips that meet these recommended specs:
- File formats: MP4 (video clips), or M4A, MP3, and WAV (audio clips)
- Video codec: H264
- Video bit rate: 800 kbps
- Audio codec: AAC
- Audio bit rate: 96 kbps/48 khz mono
Requirements
- Maximum 10 GB per clip
- Supported audio file formats: M4A, MP3, and WAV
- Supported video file formats: 3GP, ASF, F4V, MKV, MOV, MP4, MPEG, MPG, WEBM, and WMV
- Clips must be at least 15 seconds long.
- Video clips must include an audio track; the audio track can be silent, but videos without an audio track will not process successfully.
Additional notes
- When you upload a video, it is transcoded to the appropriate bit rate and resolution based on the player size selected in the event setup. If you change the player size after uploading a video, you must upload the video again to have it transcoded for the new player size.
- Each clip can be up to 10 GB. We recommend using a high-speed wired internet connection to avoid time-outs. You could also transcode the file to a smaller file size or bit rate before uploading to improve the upload and processing time.
- You can upload videos of any resolution (for example, 1080p), but higher resolution videos may stream at a lower quality than you'd see on your computer. Before the event, review the quality of the uploaded video to make sure it meets your standards.
Remove embedded fonts from slides
Embedded fonts are not supported. Before uploading a slide deck to an event, you must remove embedded fonts from the deck.
Note: In total, we support over 1500 different font families. We probably already support your custom fonts or can add them for you. Contact Support for assistance.
To remove embedded fonts (Windows):
- Open the PowerPoint file on your computer.
- On the File menu, select Options and then in the left column, select the Save tab.
- At the bottom, under Preserve fidelity when sharing this presentation, clear the Embed fonts in the file check box.
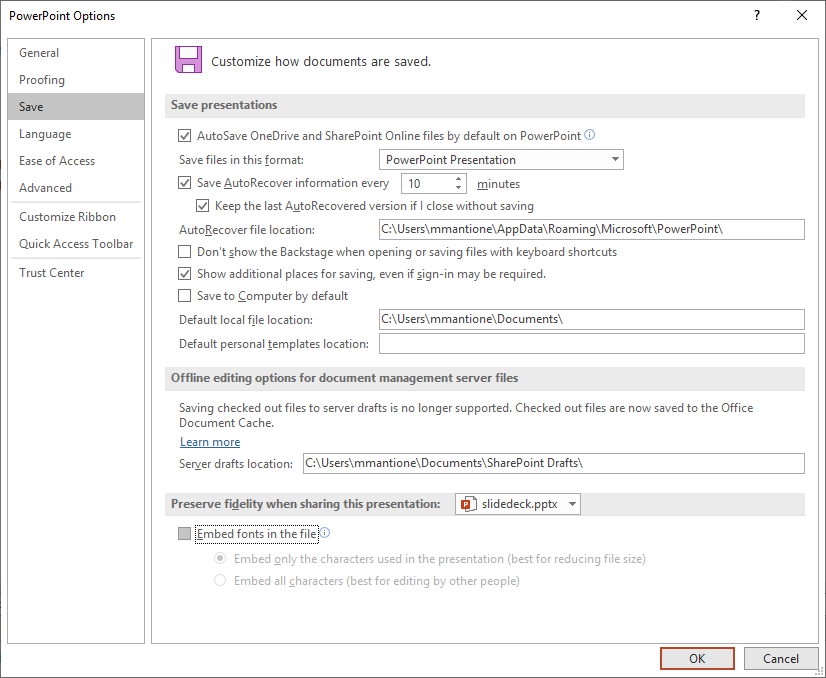
- Save the file, then close and re-open it.
A different font is substituted for the font that had been embedded previously.

To remove embedded fonts (Mac):
- Open the PowerPoint file on your computer.
- On the PowerPoint application menu, click Preferences.
- Under Output and Sharing, click Save.
- Under Font Embedding, clear the Embed fonts in the file check box.
- Save the file, then close and re-open it.
A different font is substituted for the font that had been embedded previously.
Supported 3rd party tools
Enhance your events by including interactive elements with third-party apps and platforms. By default, polls, Q&A, and surveys are already included with your webcasting account, but you can use your own third-party tools to include these features, captions and interpretation, and more.
Note: You must have an account with the app or platform that you want to incorporate in your event.
We've tested and currently support the following third-party tools. Don't see the tool you'd like to use? Contact Support or your sales representative.
Jump to: Interactive Features | Captions, Interpretation, and Transcripts | Other Features
Interactive Features
| Third-party Tool | Features & Services | Expected Domains |
|---|---|---|
| Chatroll | Chat | chatroll.com |
| Conferences i/o | Polls Q&A |
cnf.io conferences.io |
| Kahoot | Brainstorms Leaderboards Polling Quizzes Surveys Word clouds |
kahoot.it |
| MeetingPulse | Brainstorms Downloadable Materials Photos Polls Q&A Quizzes Raffles Surveys |
meetingpulse.net meet.ps |
| Mentimeter | Polls Quizzes Q&A Surveys Word clouds |
mentimeter.com menti.com |
| Mural | Collaborative whiteboards | mural.co |
| Pigeonhole Live | Chat Polls Q&A Quizzes Reactions Registration Surveys |
pigeonhole.at |
| Poll Everywhere | Brainstorms Polls with clickable images, graphs, and maps Q&A Surveys Word clouds |
embed.polleverywhere.com pollev.com polleverywhere.com pollev-embeds.com |
| Prezi | Presentations Videos |
prezi.com |
| Remesh | Discussion guides with: Images Messages Polls Questions Videos |
remesh.chat |
| SCANTrivia | Icebreakers Leaderboards Trivia questions |
scanalytics.net scancode.mobi |
| Slido | Ideas Polls Q&A Quizzes Word clouds |
*.sli.do |
| SpatialChat | Interactive breakout rooms | spatial.chat |
| SurveyPlanet | Polls Surveys |
s.surveyplanet.com |
| Vevox | Polls Q&A Surveys Quizzes Word clouds |
vevox.app |
| Vpoll | Polls | app.vpoll.mobi |
Captions, Interpretation, and Transcripts
| Third-party Tool | Features & Services | Expected Domains |
|---|---|---|
| 3Play Media | Live automatic captions Live professional captions |
3playmedia.com |
| Ai-Live | Live professional captions | uk.ai-live.com au.ai-live.com |
| Captioned Text | Live professional captions Real-time transcripts |
captionedtext.com |
| Interactio | Live interpretation | app.interactio.io interactio.io |
| Interprefy | Live interpretation | interprefy.interpret.world interpret.world |
| KUDO | Live interpretation | *.kudoway.com |
| StreamText | Live professional captions | streamtext.net |
| Wordly | Live automatic captions | *.wordly.ai |
Other Features
| Third-party Tool | Features & Services | Expected Domains |
|---|---|---|
| Calendly | Calendar | calendly.com |
| Cvent | Automated email communications Payment collection Pre-registration questions |
cvent.com |
| Google Drive file embeds and links | google.com | |
| Jifflenow | Attendees can request meetings with Inbound Meetings Sync registration data |
jifflenow.com |
| Walls.io | Social media wall | walls.io |
Upload audio clips for use in a recorded event
For audio only broadcasts. To include pre-recorded audio in an On-Demand or Simulated Live event, upload audio files as primary event clips. Once uploaded, the clips can be added to the event in the editing studio. For more information, see Assemble or edit an event recording.
You can include up to 10 primary audio clips. Each clip can be up to 10 GB and must be at least 15 seconds long. Supported file types include: M4A, MP3, WAV
For more information about primary media clip requirements, see Primary Media Clip Specs and Requirements.
To upload a primary audio clip:
- Sign in to the Webcast Admin portal and edit the event.
- On the left panel, click the Event Content tab.
- Under Media Clips, click Upload a Clip.

- In the Upload a New Clip window, select Primary Event Clip as the file type, click Choose File, select the audio file, and then click Submit.
Note: The clip title is automatically generated based on the file name. You can optionally change the title before clicking Submit.

- After the clip has finished uploading, an Upload Successful message is displayed to let you know that the clip is being transcoded by the system. Click Ok.
The clip is displayed in the Primary Media Clips section with a processing status. Once the clip has finished processing, you can optionally change the title.

- Click Save and Continue to save changes to the event content.

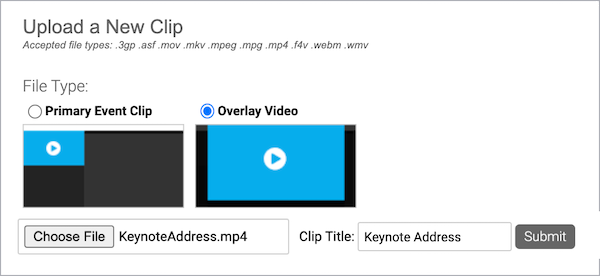

Upload videos for use in a recorded event
To include videos in a recorded event, upload them to your event content. Then in the editing studio, add videos to the event timeline and publish the event. For more information, see Assemble or edit an event recording.
When you upload a video for a recorded event, you must designate where it will be played: upload it either as a Primary Media Clip or an Overlay Video. An Overlay Video plays on top of the audience event window and is designed to be supplementary content on an event (example - commercial or promotional video). A Primary Media Clip plays in the video player (where you see presenter webcams during a Live event) and is designed to be the primary content on an event.
Notes:
- Recorded events require at least one primary media clip. Overlay videos can’t be used as the sole event content.
- For audio only broadcasts, you can only upload videos as overlay videos. The video player is used to display presenter headshots and play audio clips. For more information, see Upload audio clips for use in a recorded event.
- Include as many overlay videos as you like and up to 10 primary clips. Each video can be up to 10 GB, must be at least 15 seconds long, and must include an audio track.
For more information about video requirements, see Overlay Video Specs and Requirements and Primary Media Clip Specs and Requirements.
Jump to: Upload a primary media clip | Upload an overlay video
Upload a primary media clip
To avoid distortion, upload primary media clips with the same aspect ratio as the video player (16:9 for video bridge broadcasts; 4:3 or 16:9 for webcam and encoder).
To add a primary media clip to an event:
- Sign in to the Webcast Admin portal and edit the event.
- On the left panel, click the Event Content tab.
- Under Media Clips, click Upload a Clip.

- In the Upload a New Clip window, select Primary Event Clip as the file type, click Choose File, select the clip, and then click Submit.
Note: The clip title is automatically generated based on the file name. You can change the title before clicking Submit.
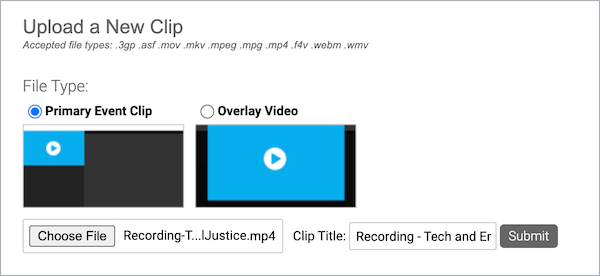
- After the clip has finished uploading, an Upload Successful message is displayed to let you know that the clip is being transcoded by the system. Click Ok.
The clip is displayed in the Primary Media Clips section with a processing status. Once the clip has finished processing, you can optionally change the title.

- Upload additional videos. When finished, click Save and Continue to save changes to the event content.


Upload an overlay video
To upload a video to an event:
- Sign in to the Webcast Admin portal and edit the event.
- On the left panel, click the Event Content tab.
- Under Media Clips, click Upload a Clip.
- In the Upload a New Clip window, select Overlay Video as the file type, click Choose File, select the clip, and then click Submit.
Note: The clip title is automatically generated based on the file name. You can change the title before clicking Submit.

- After the clip has finished uploading, an Upload Successful message is displayed to let you know that the video is being transcoded by the system. Click Ok.
The video is displayed in the Overlay Videos section with a processing status. Once the video has finished processing, you can optionally change the title.

- Upload additional videos. When finished, click Save and Continue to save changes to the event content.
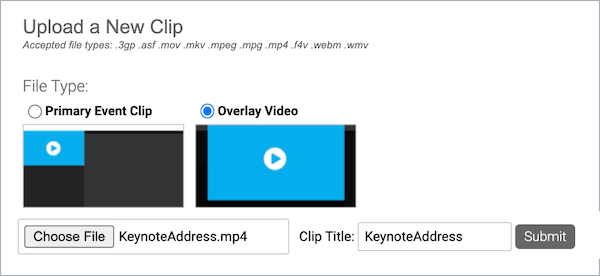

Upload videos to play in a Live event
Uploading a Video to the Event
- Sign in to the Webcast Admin portal. Locate and edit the event.
- On the left panel, click the Event Content tab.
- Under Media Clips, click Upload a Clip.

- In the Upload a New Clip window, click Choose File and browse to select the video.
- The video title is automatically generated based on the file name. If you'd like, change the clip title and click Submit.

- After the video has finished uploading, an Upload Successful message is displayed to let you know that it is being transcoded by the system. Click Ok.
- The video is displayed in the Overlay Videos section with a processing status. Once it has finished processing, you can optionally change the video title.

- Click Save and Continue to save changes to the event content.
Recommended Specs
- File Format: MP4
- Video Codec: H.264
- Video Bit Rate: 800 kbps
- Aspect Ratio: 16:9 widescreen*
- Audio Codec: AAC
- Audio Bit Rate: 96 kbps / 48 khz mono
*Tip: To avoid distortion, if you plan to share a video inline, upload a video with the same aspect ratio as the video player (16:9 for video bridge broadcasts; 4:3 or 16:9 for webcam and encoder).
Overlay Video Requirements
- Maximum Video Per Event: 10
- Maximum Video File Size: 10 GB per video
- Minimum Video Length: 15 seconds
- Audio Requirements: Must include an audio track. The audio track can be silent, but must be included.
- Supported File Formats: 3GP, ASF, MOV, MKV, MPEG, MPG, MP4, F4V, WEBM, and WMV.
For more information about video requirements, see Overlay Video Specs and Requirements.
Best Practices
- Upload videos at least 24 hours before the presentation start time.
- Use a high-speed wired internet connection when uploading video files to avoid time-outs.
Troubleshooting Tips
- Make sure the video file is at least 15 seconds long.
- Make sure the video file includes an audio track.
- Make sure your video file is a supported file type.
For additional help, contact Support.
Upload Slides to an Event
The webcasting platform allows presenters to upload their presentation content so it can be displayed to the remote audience. This needs to be done ahead of time, so the platform can convert it to a format that can be displayed to the audience. Only PowerPoint files are supported by the platform.
Uploading Slides to the Event
- Sign in to the Webcast Admin portal. Locate and edit the event.
- On the left panel, click the Event Content tab.
- Under PowerPoint Decks, click Upload New Slide Deck from My Computer.
- Click Choose File and browse to select the slide deck.

- The slide deck title is automatically generated based on the file name. If you'd like, change the title and click Upload.
- Enable Process as Images (No animations) to process the slides as static images. This expedites processing time for last minute uploads and flattens content to resolve issues related to complex graphs or charts.
- Enable Create PDF to create a PDF download of the slides that will be available for viewers to download as they watch the event.
- Your presentation will then upload to the platform. Do not close the window until the upload is complete.
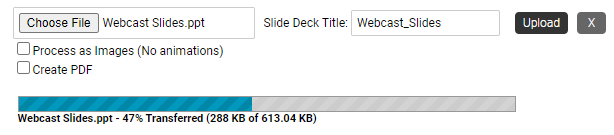
- After the slides has finished uploading, an Upload Successful message is displayed to let you know that it is being processed by the system.
- The slide deck is displayed under the My Uploaded Slide Decks section with a processing status. Once it has finished processing, the slides are ready to go.

- Right-click on a slide deck here for additional options.
- Drag slide deck thumbnails to reorder how the slide decks will appear in the Live Studio.


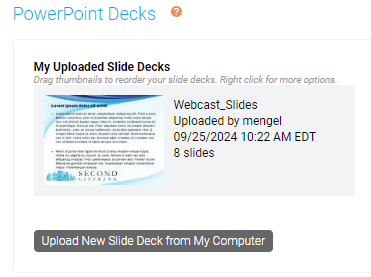
PowerPoint Requirements
- PowerPoint Version: PowerPoint 2007 or later
- File Format: .PPT or .PPTX
- Aspect Ratio: Standard (4:3) or Widescreen (16:9)
- Remove any "Read-Only" restrictions or password protection before uploading the file
- Use only Microsoft Supported Fonts - https://www.microsoft.com/typography/fonts/product.aspx?PI D=157
- Custom Fonts can be used, but need to be provided to Support to be uploaded to our platform to ensure Support. Custom font files need to be provided in OTF or TTF format at least 48 hours before your event. Slides decks need to be reuploaded after custom fonts have been installed to utilize custom fonts.
- Text should be at least 28 points in order to be clearly visible to the audience.
- Do not embed or insert audio or video clips into your PowerPoint presentation.
- Audio and Video clips are uploaded separately.
- Do not link to external images, sites, videos or spreadsheets.
- Files are limited to 500 MB in size and 200 slides per deck.
Best Practices
- Upload PowerPoint files at least 24 hours before the presentation start time.
- Slide decks should be numbered started at Slide 1.
- Try to keep the background to one color and avoid fading or transitional backgrounds.
- If slides are uploaded after a user has joined the Live Studio, they will need to exit and re-enter the Live Studio to see the updated content. It is recommended to have all presenters manually re-enter the Live Studio once it is confirmed the new slides are available. If presenters do not re-enter the Live Studio after new slides are uploaded, they will see an error message when the "Start Webcast" button is clicked and be forced to refresh, which may impact the start of the event while presenters reconnect.
Troubleshooting Tips
- If your presentation is not a . PPT or .PPTX file, it will need to be converted before upload.
- Check if any embedded videos have been removed.
- If fonts are not displaying correctly, removed embedded fonts from the presentation.
- If there are formatting issues, you can reupload the presentation with the "Process as Images" checkbox enabled. This will remove any animations or slide builds, but will correct formatting issues.
For additional help, contact Support.
Add headshots to an audio event
Use Headshots in your Audio-Only events to display a photo of the current speaker or logo to the audience. These images will appear to the audience in the top left corner of the player above the media controls. Presenters can changes these images as needed from the Live Studio or added later in the On-Demand Studio.
Setup
Images can be uploaded on the Event Content page under Add Headshots. Click on the Add Headshots text and select Upload New Headshot.
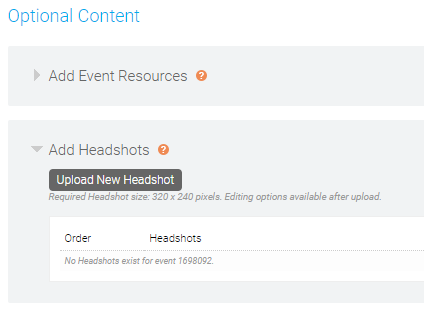
Images can be uploaded from your computer using the Upload New option (default). Click Choose File to locate the image on your computer and click Upload to add it to the event. To upload an image from a URL, click From a URL along the left column and enter the URL for the image you would like to upload.
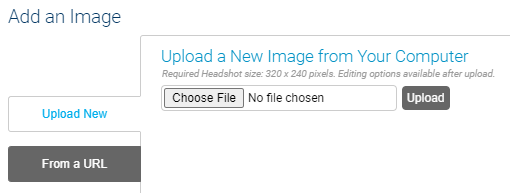
The headshot window is 320x240. If you upload an image larger than this, you will be prompted to resize the image. Select Crop Image to Fit to crop the crop a portion of the image to use or select Scale Image to Fit to resize the entire image to fit within the headshot window. Click Apply to save.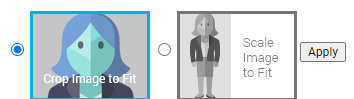
Images can be edited after being uploaded using the controls along the top of the interface. Resize or Crop images to adjust the size. Use the Canvas to add extra space around the image. Use the Rotate option to rotate an image or use Text to add text, like a speaker's name, title and/or company. Click Save in the top right to save an image for use on your event.

Live Event Controls
For live events, available headshots will appear on the Headshots tab of the Live Studio. The active headshot has a green box around the image here and will appear in the top left window of the Live Studio to confirm what viewers are seeing.
By default, the first headshot in your list is selected in Live Studio will be sent to your audience when the webcast is started. You can change the default order in the headshot list or select a different headshot in the Live Studio before clicking Start Webcast.
Any presenters with Live Studio access can advance headshots on the event.
On-Demand Event Controls
For on-demand events, available headshots will appear in the Headshots Library of the OD Studio.
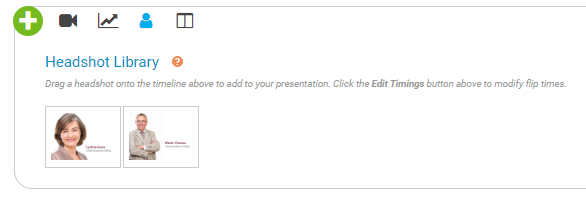
Use the Headshots track of the Event Timeline to control what headshots appear and at what time they appear to viewers. Drag and drop headshots from the Library onto the Timeline to add them to the event.
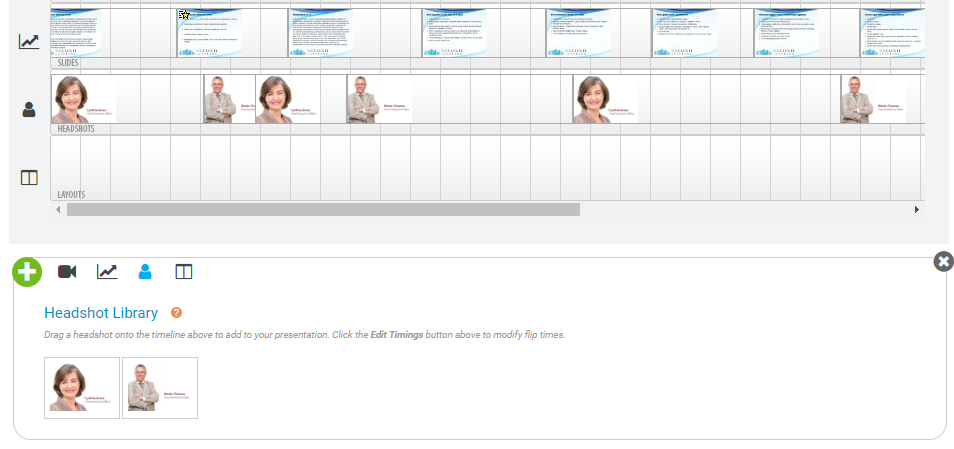
Right-click on a headshot on the timeline to access additional controls. Click Edit Headshot to add a timecode for when the headshot should appear. Click Remove Headshot to remove it from the event.
Best Practices
- Headshots must be exactly 320 x 240 pixels in size. Larger images can be resized if needed.
- Headshots must be in .jpg or .png format.
Add content download or external links
Use the Event Resources option to share supplemental files or links with your audience. This is commonly used to add files such as PDFs, Word documents, Excel spreadsheets, PowerPoint decks, and more.
Setup
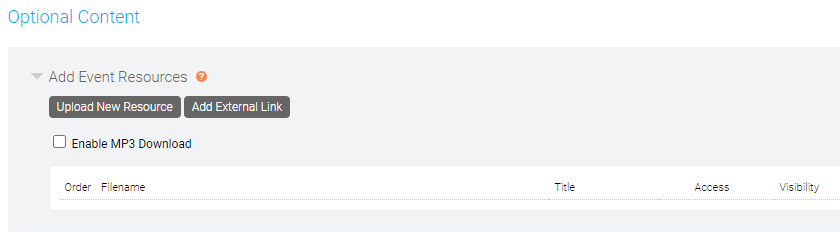
To upload a file, click Upload New Resource. Click Choose File to select the file and use the Document Title field to enter a name that will be visible to your audience. To allow the file to be shared outside the event, select Make Shareable.

By default, files uploaded as Event Resources are only accessible to viewer from within the webcast player. If a file is set to Make Shareable, click Edit Access to access a URL for the uploaded file, which can be used to share that Event Resources outside of the webcast player.

To include a link for viewers to access in the Event Resources, click Add External Link. In the URL field, enter the link to share with your audience. In the Title field, enter a name that will be visible to your audience. Note: A secure https URL is required.

If you broadcast your event by phone, select Enable MP3 Download to allow the audience to download the event audio.
Once uploaded, you can rename, reorder, and remove Event Resources. To update the file sharing settings, click Edit Access.
Accessing Event Resources
Event Resources are accessible to viewers under the the Event Resources tab of the webcast player, which is located below the video or headshot window for the event.
Presenter will not be able to view or access the Event Resources in the Live Studio.
Best Practices
- Each file can be up to 500 MB.
- Supported file types include: BMP, CSV, DOC, DOCX, DOT, DOTX, GIF, HTM, HTML, JPEG, JPG, MP3, PDF, PNG, PPT, PPTX, POTX, PPS, PPSX, RTF, SLDX, TXT, XLS, XLSX, XLTX.